


If your kids are bored – I have the perfect hands on craft project: pop up greeting cards.
This DIY card can help you (and your kids) put a personalized spin on literally ANY card you want to give someone. And since I am a former teacher – I’ll even help you turn it into a little math lesson.
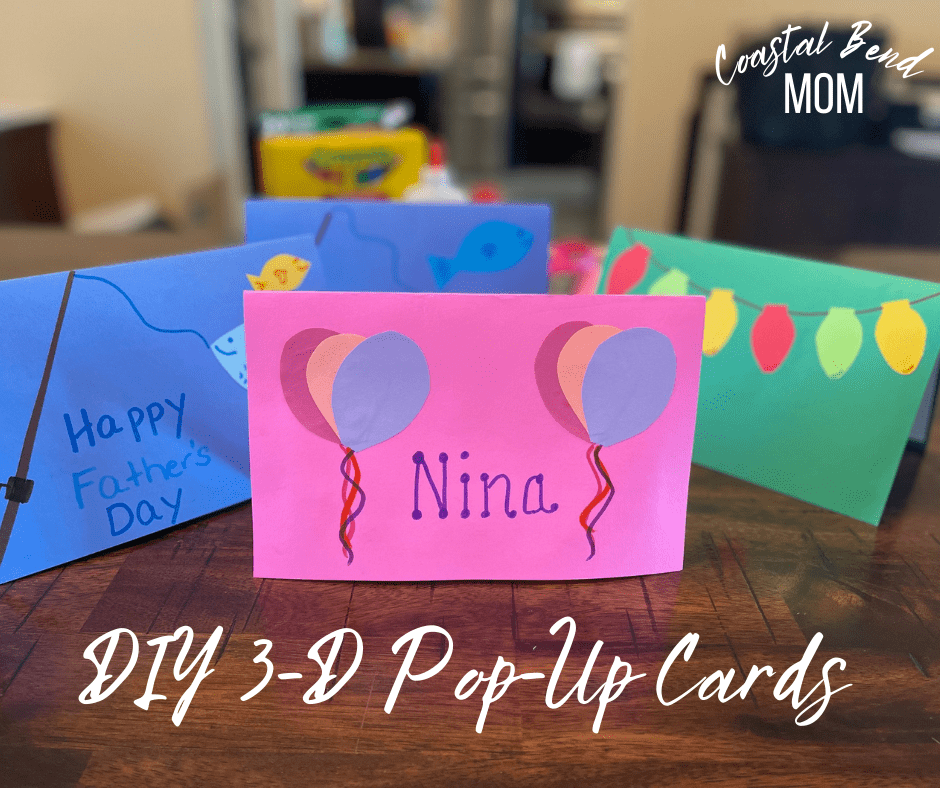
For the purpose of this blog post – we will be making a birthday card. But in all honesty, you can use the basic construction of this card to make anything for an occasion. (I’ll have some examples at the end).
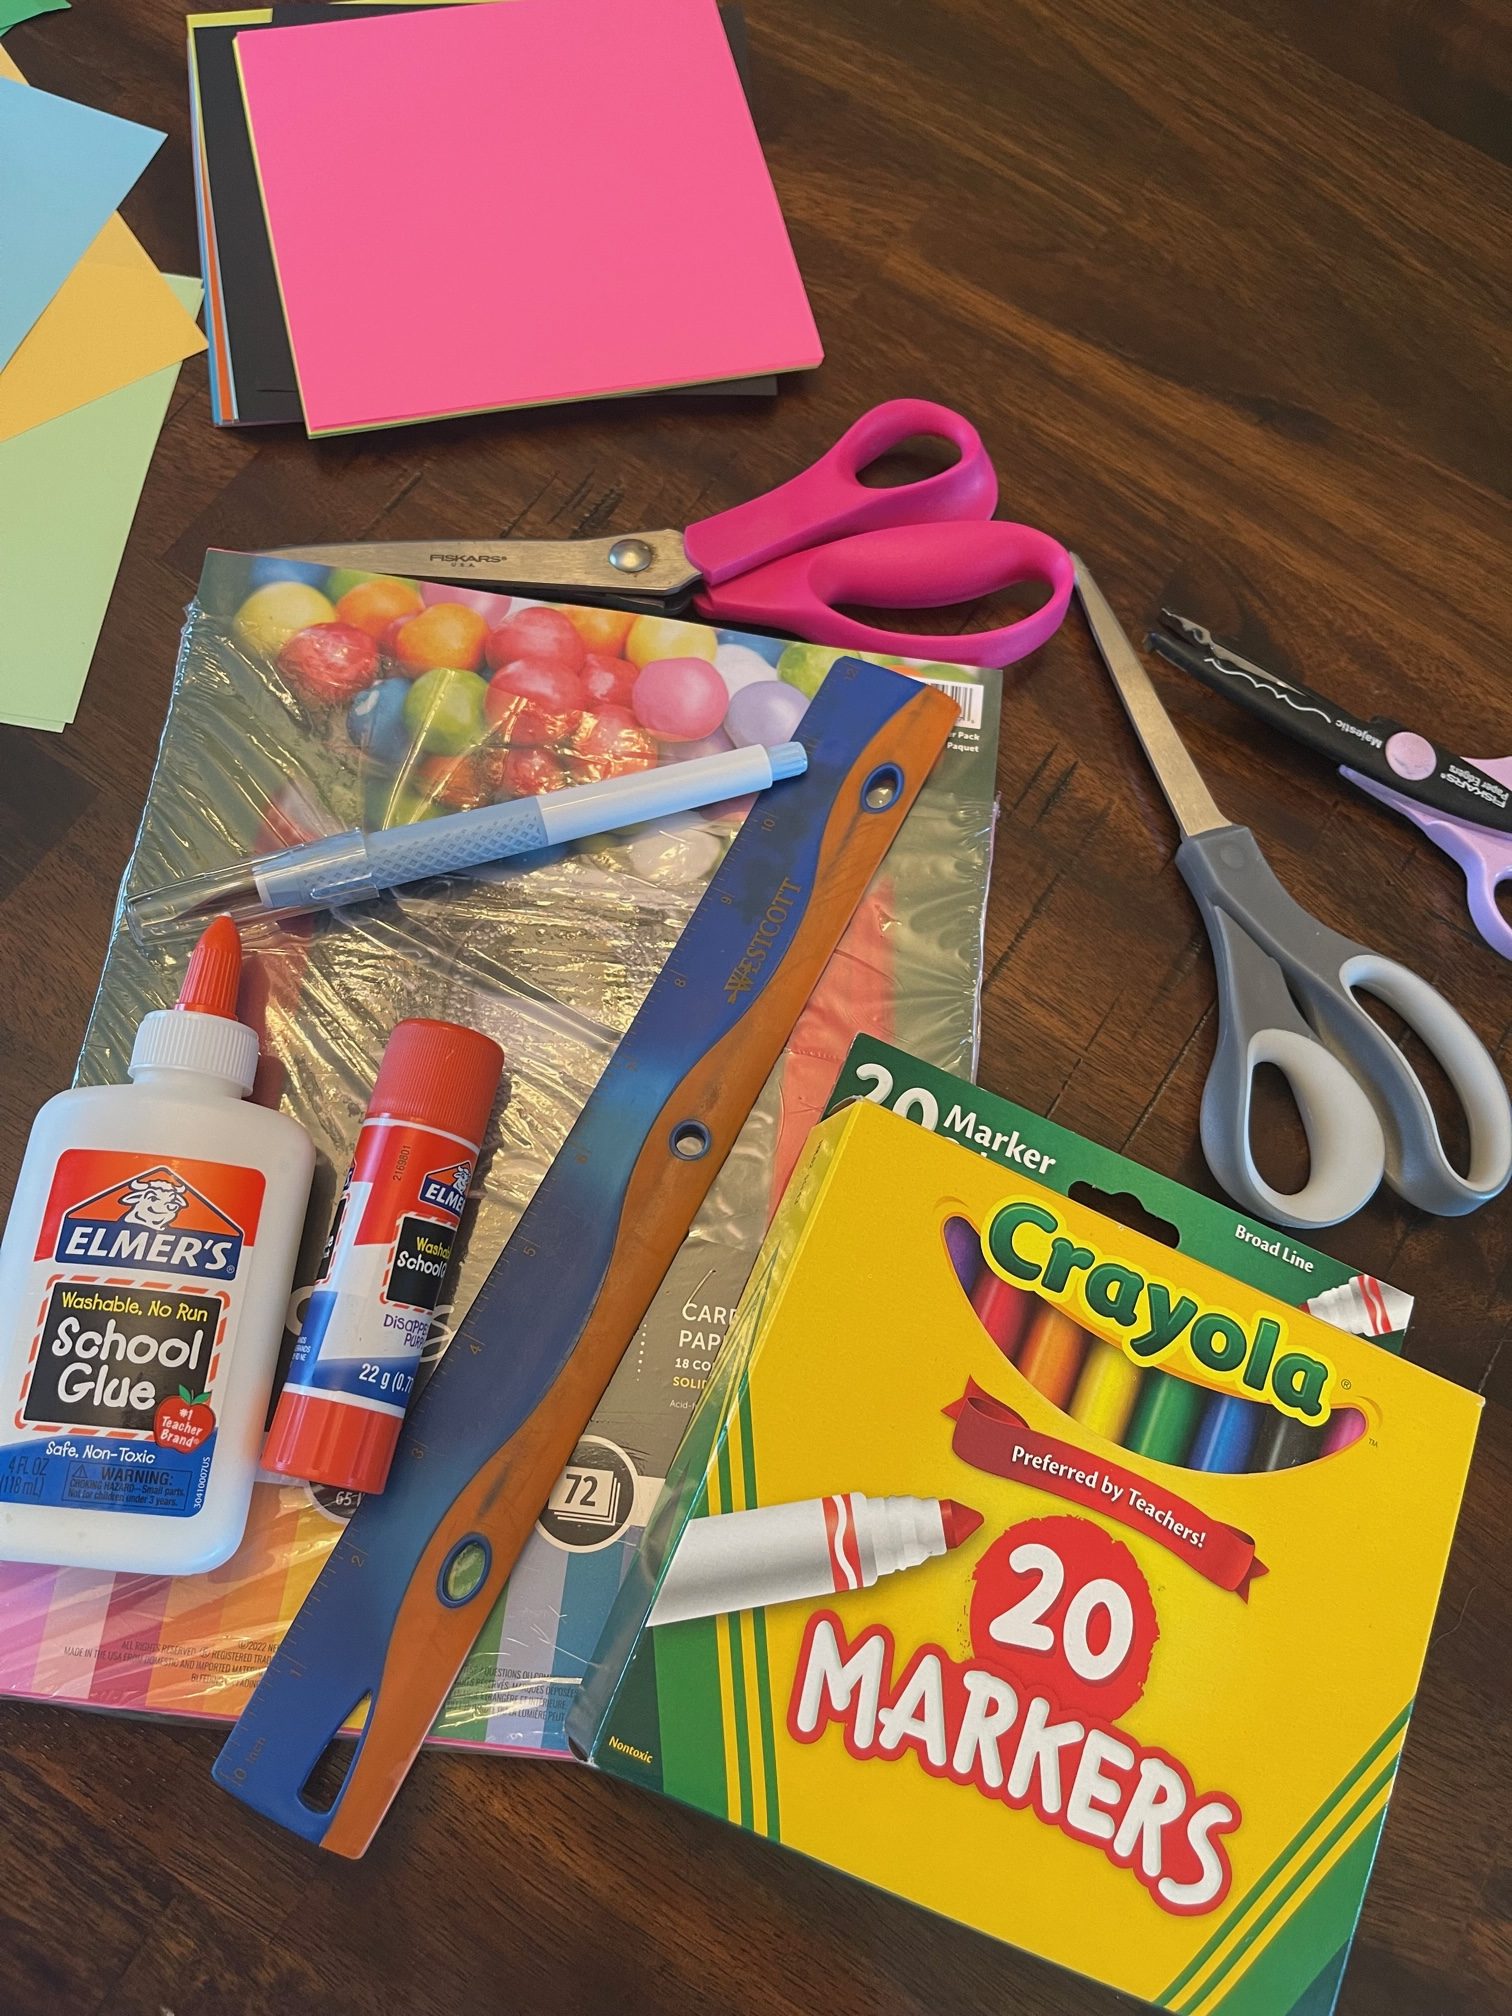
SUPPLIES
- Scissors
- Glue – wet and stick
- Card Stock or construction paper
- Markers
- Ruler
- Pencil
Depending on your crafting skills – you may want to have a crafting razor blade, glitter, googly eyes, etc. Literally whatever your heart desires.
The hardest part is math – LOL. You will start with the pop-up paper you will be using. I used regular printer paper but I think a light weight card stock could work, too. This doesn’t have to be white – but I think it helps decorate the card better. I trim all the sides of the paper to make it a bit smaller than the paper I will be using at the main part of the card.
ASSEMBLY
Take your pop-up paper and fold it in half (in portrait you are folding down – in landscape you are folding across).
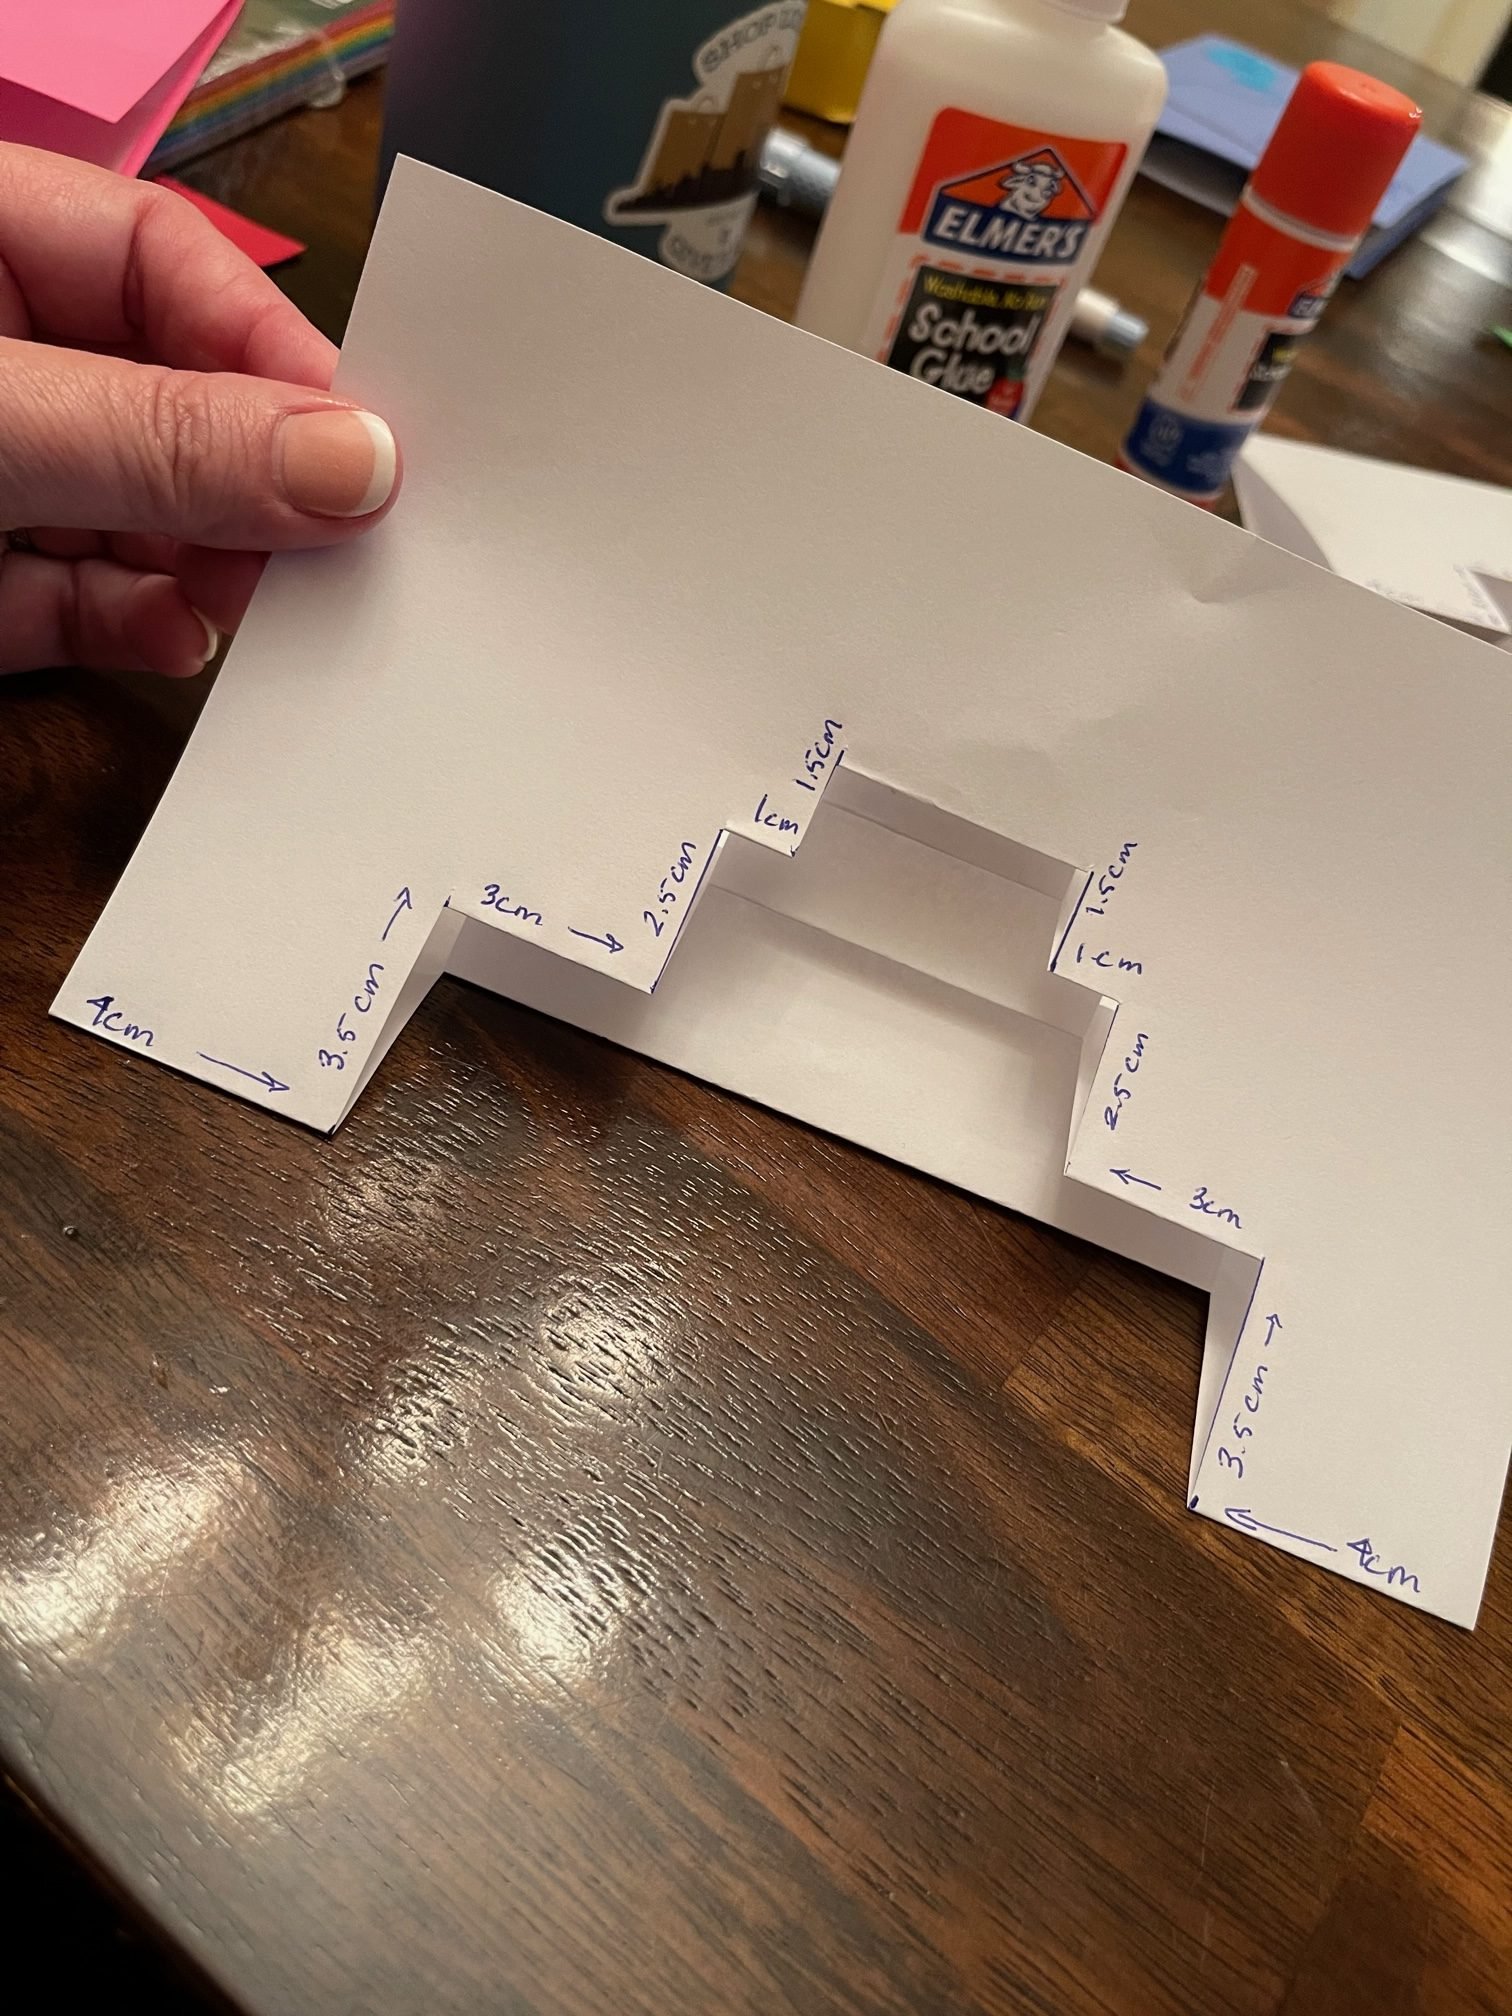
Please follow the pictures to help guide you through this part – it can get tricky. The first time I did it, I cut the wrong part and had to start over (super frustrating).
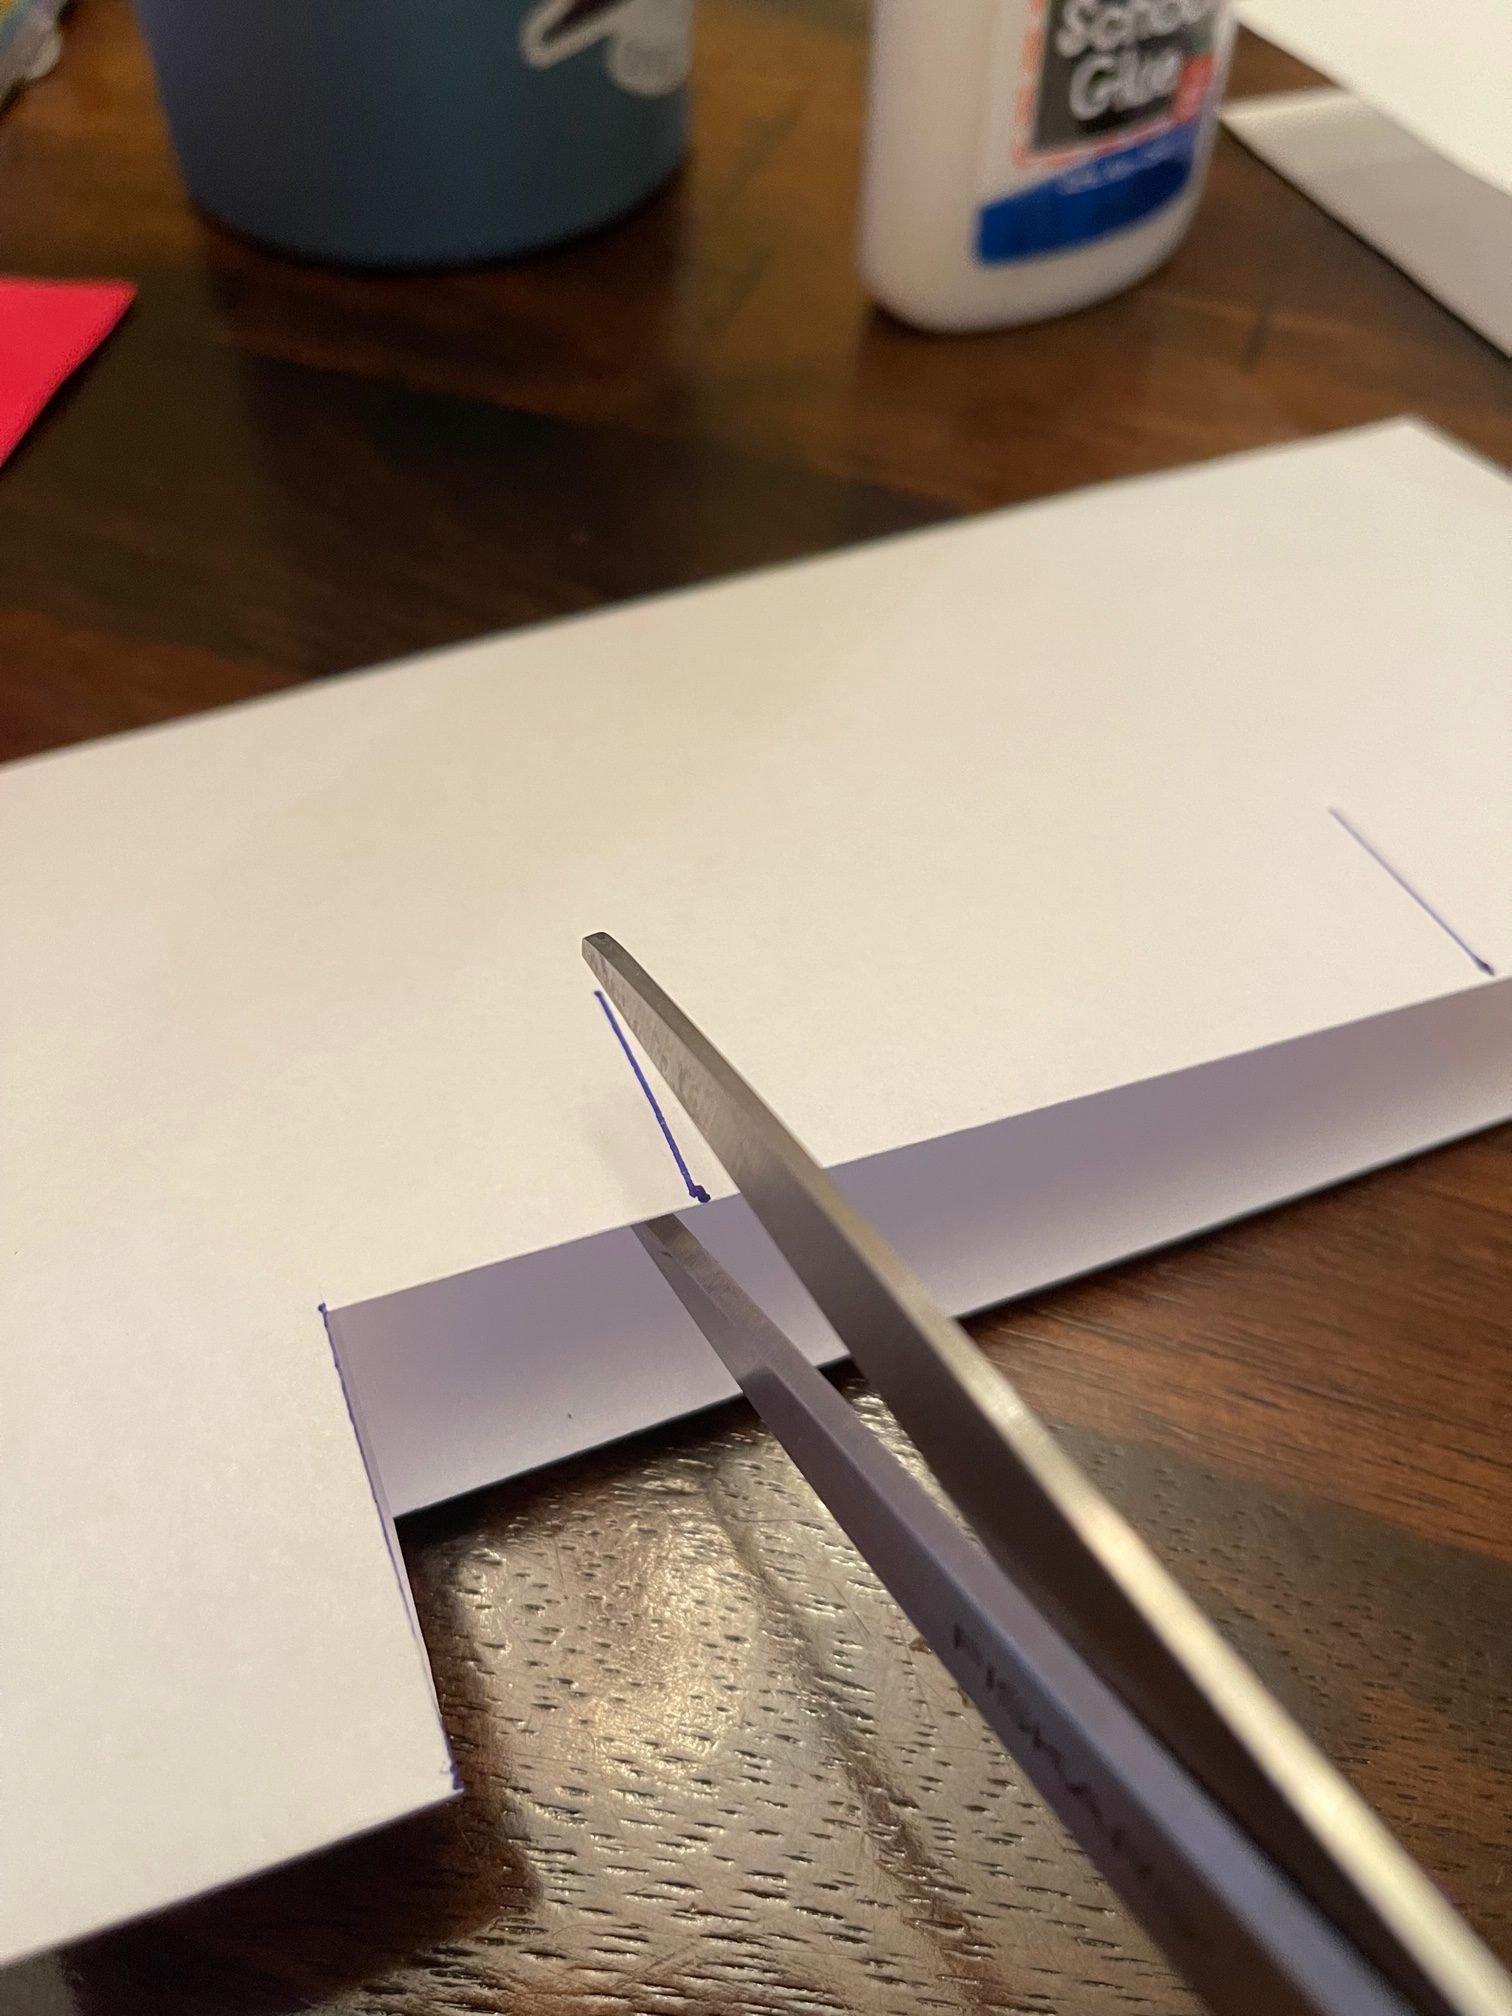
Let’s measure your pop-up. Place a dot at 4 centimeters in from the edges on the folded paper. Then using the ruler, draw a line up from that dot to 3.5 cm (you should have two lines marked for your first cuts).
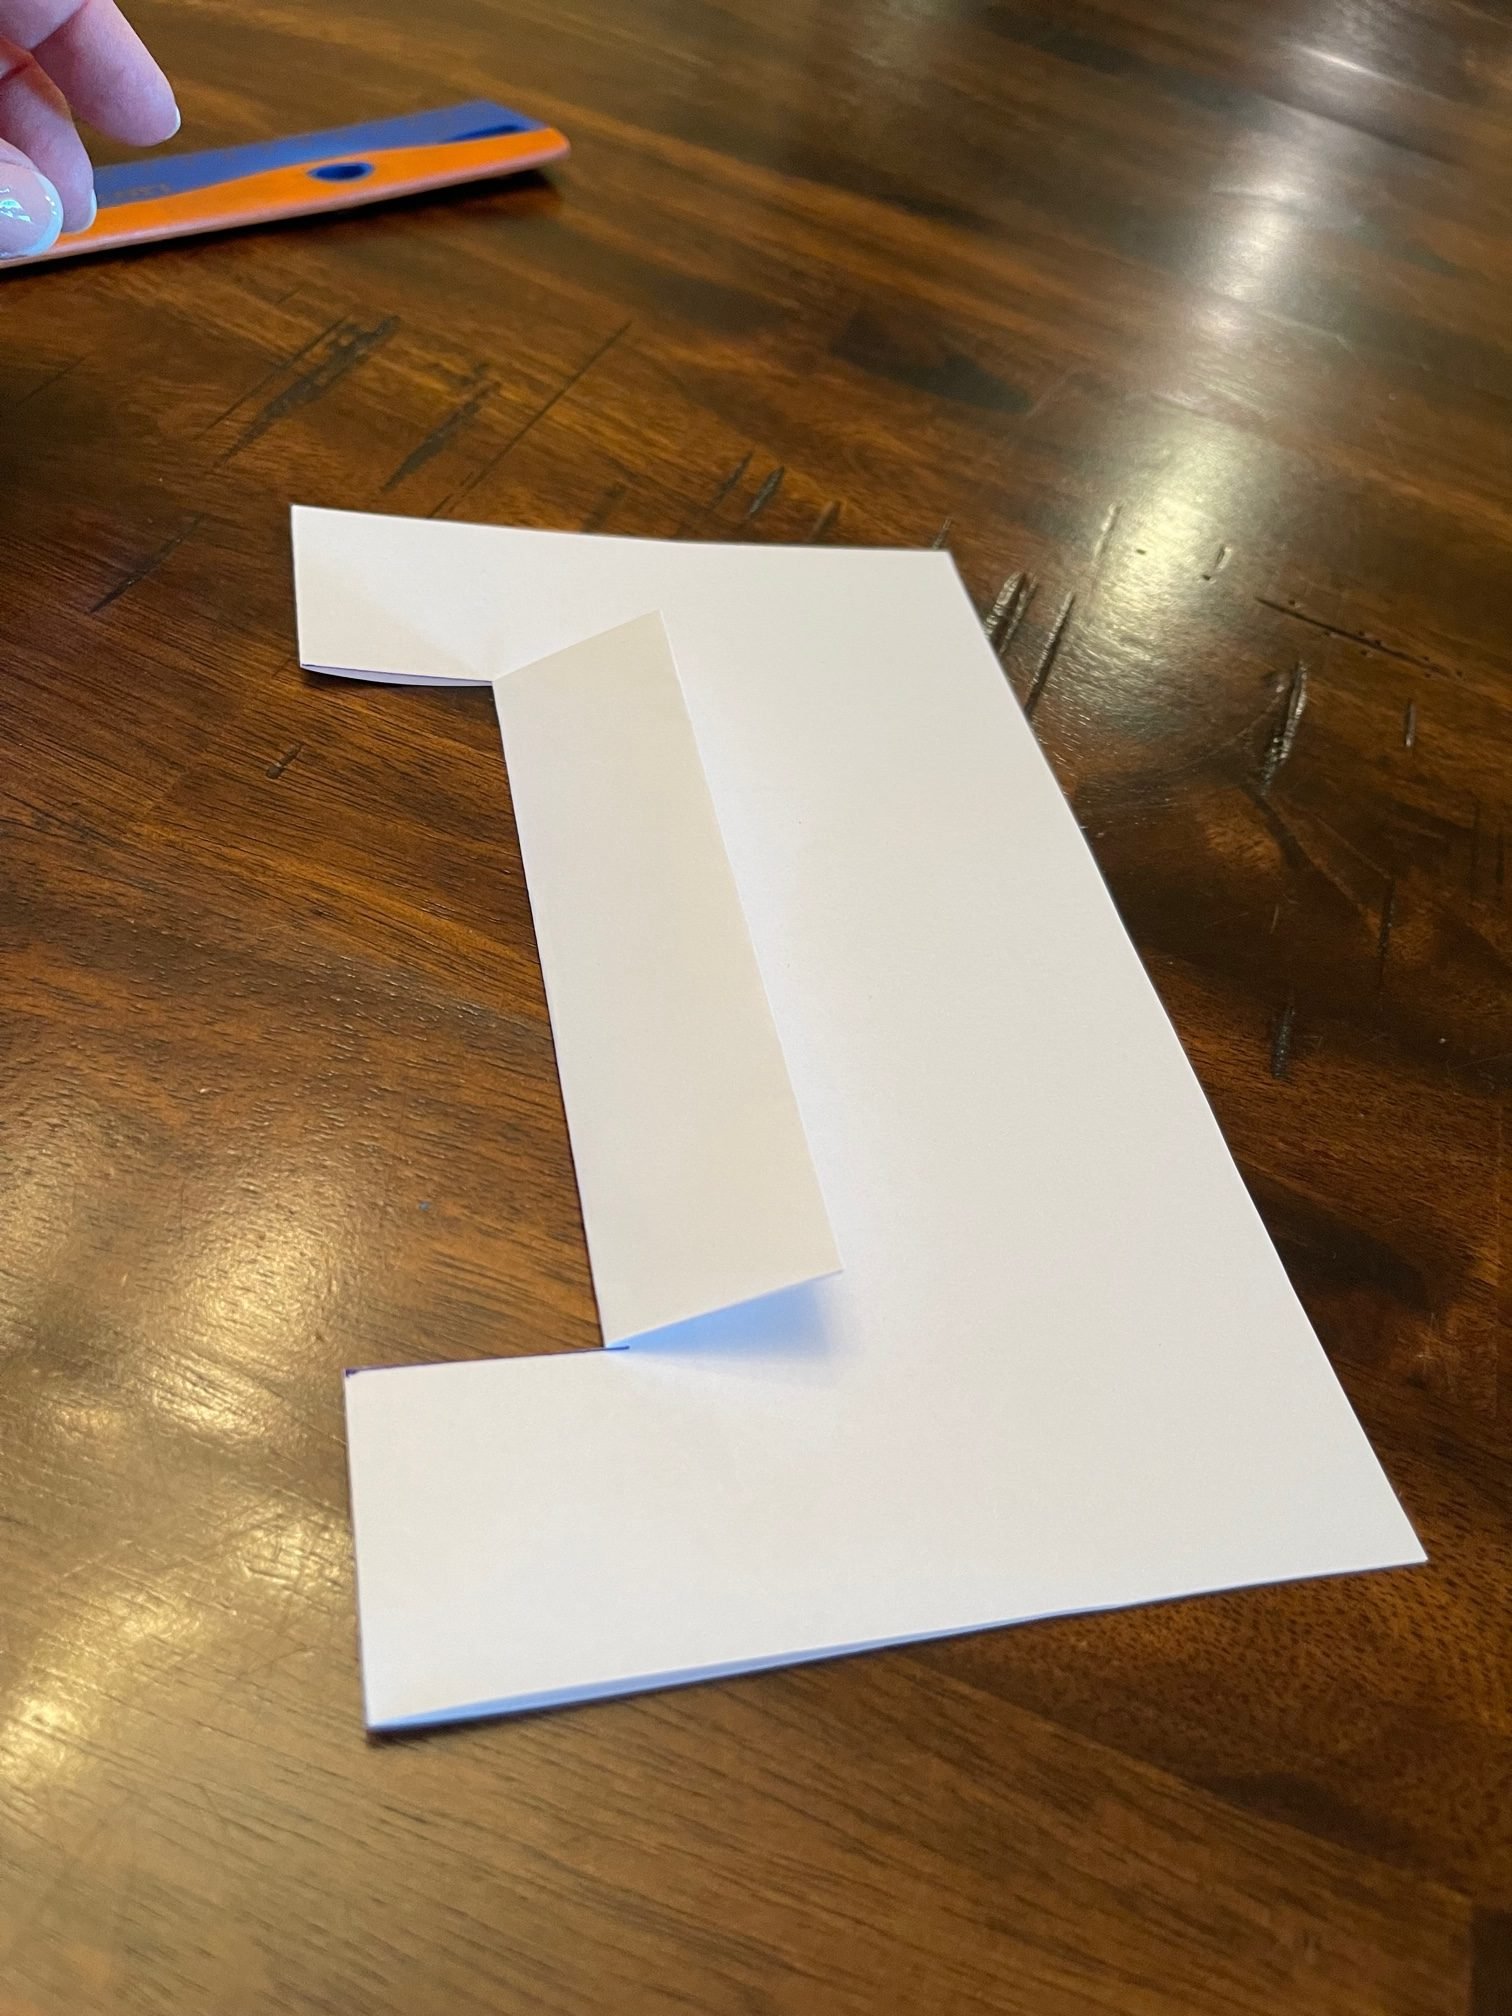
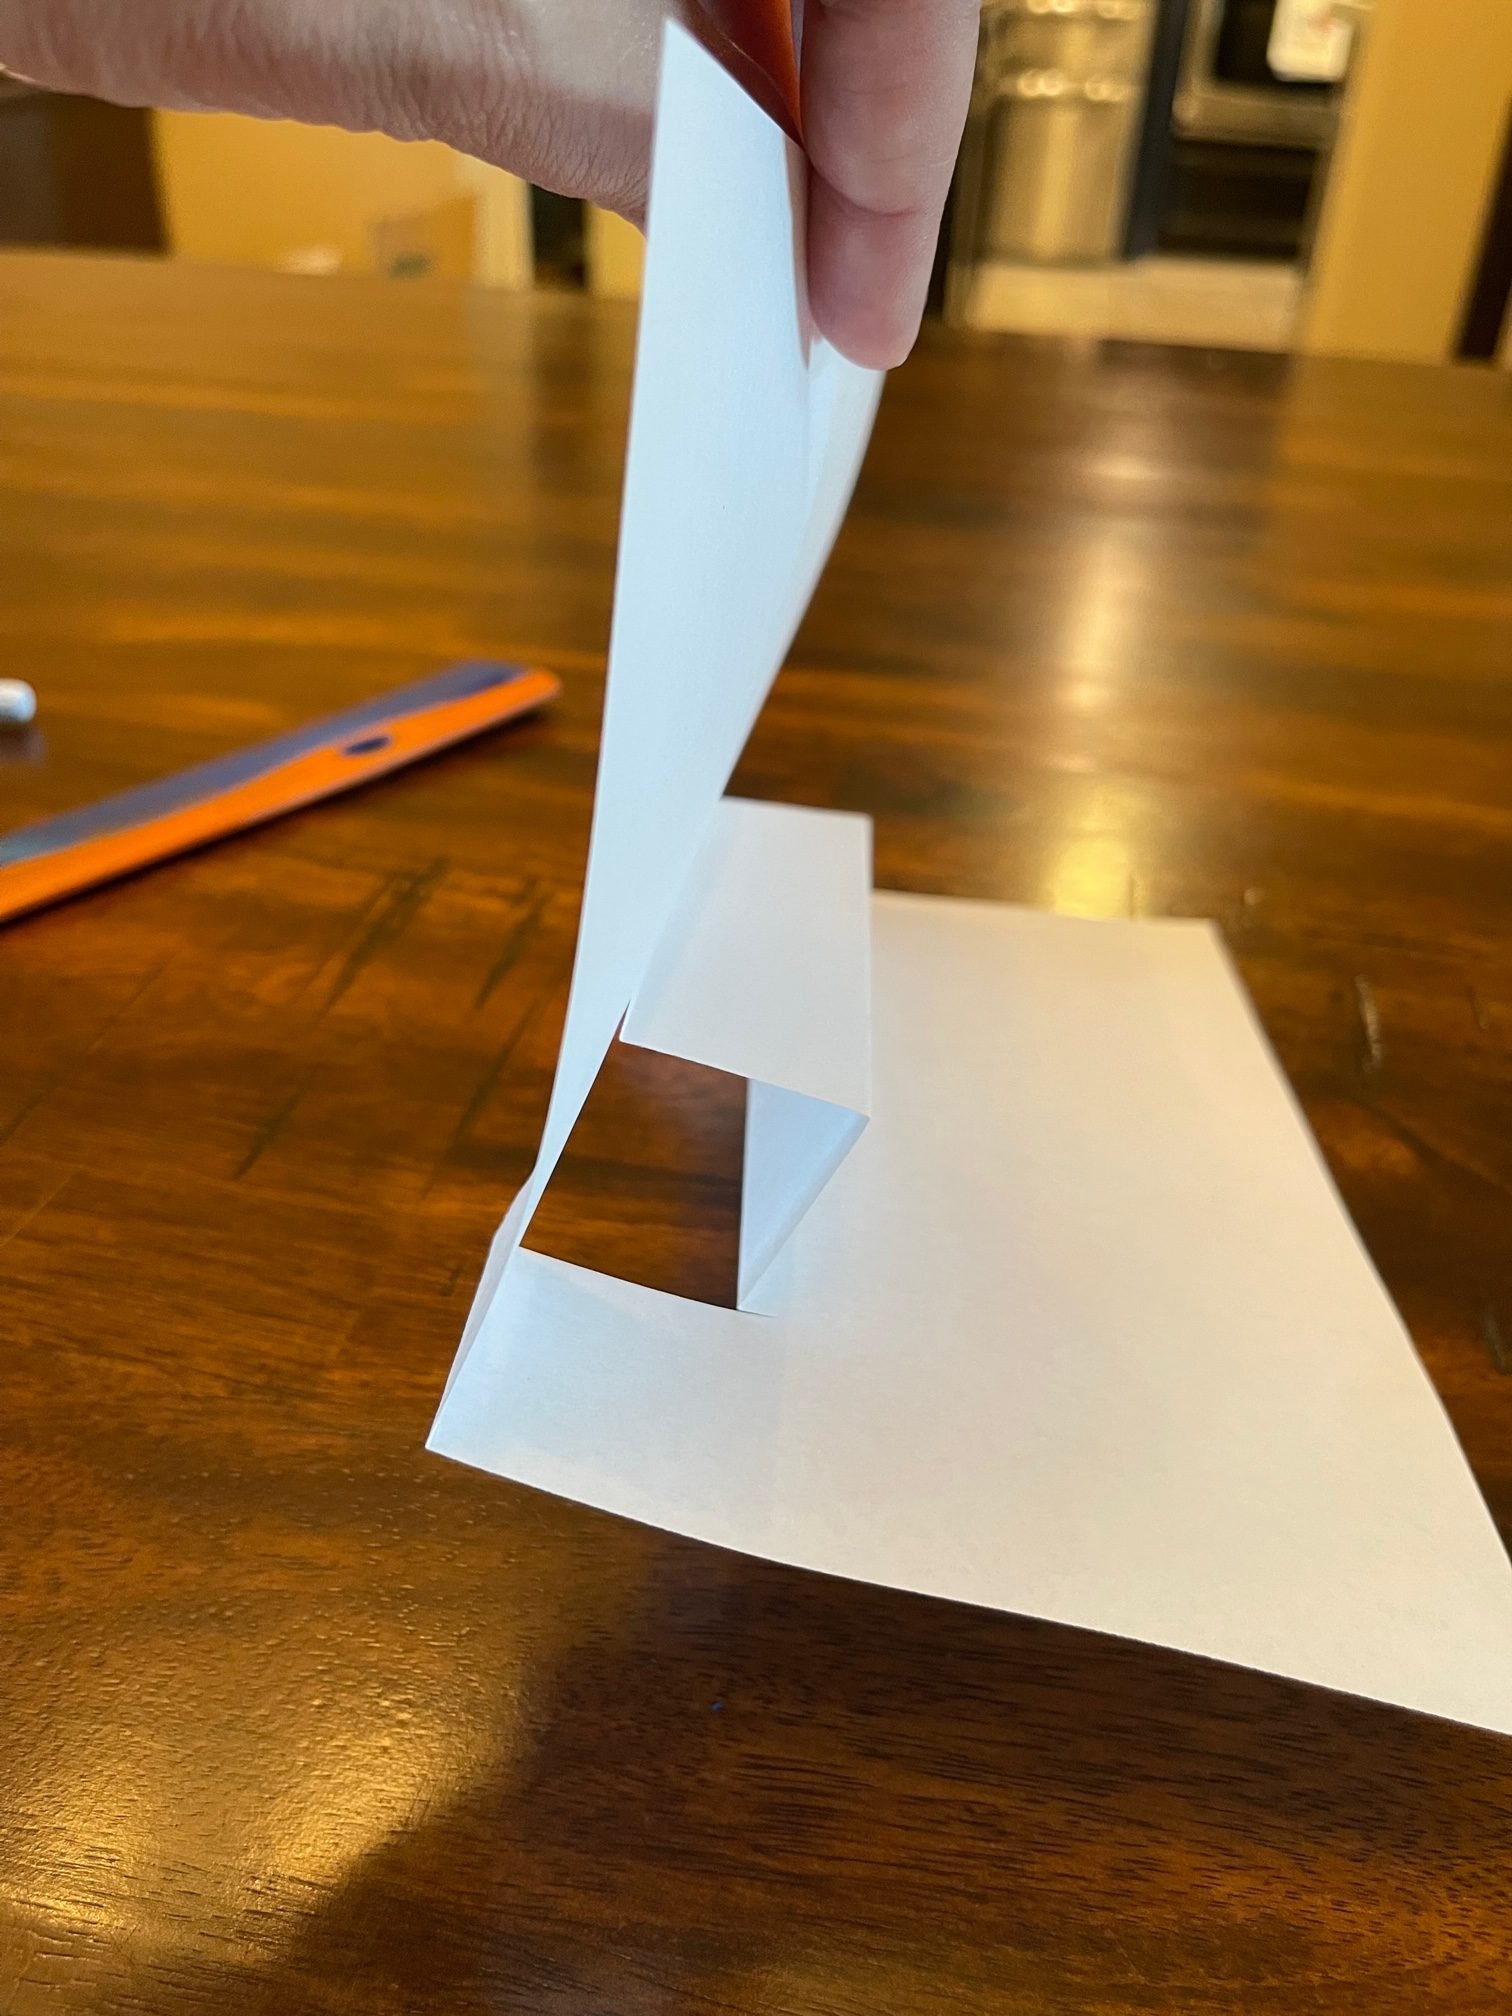
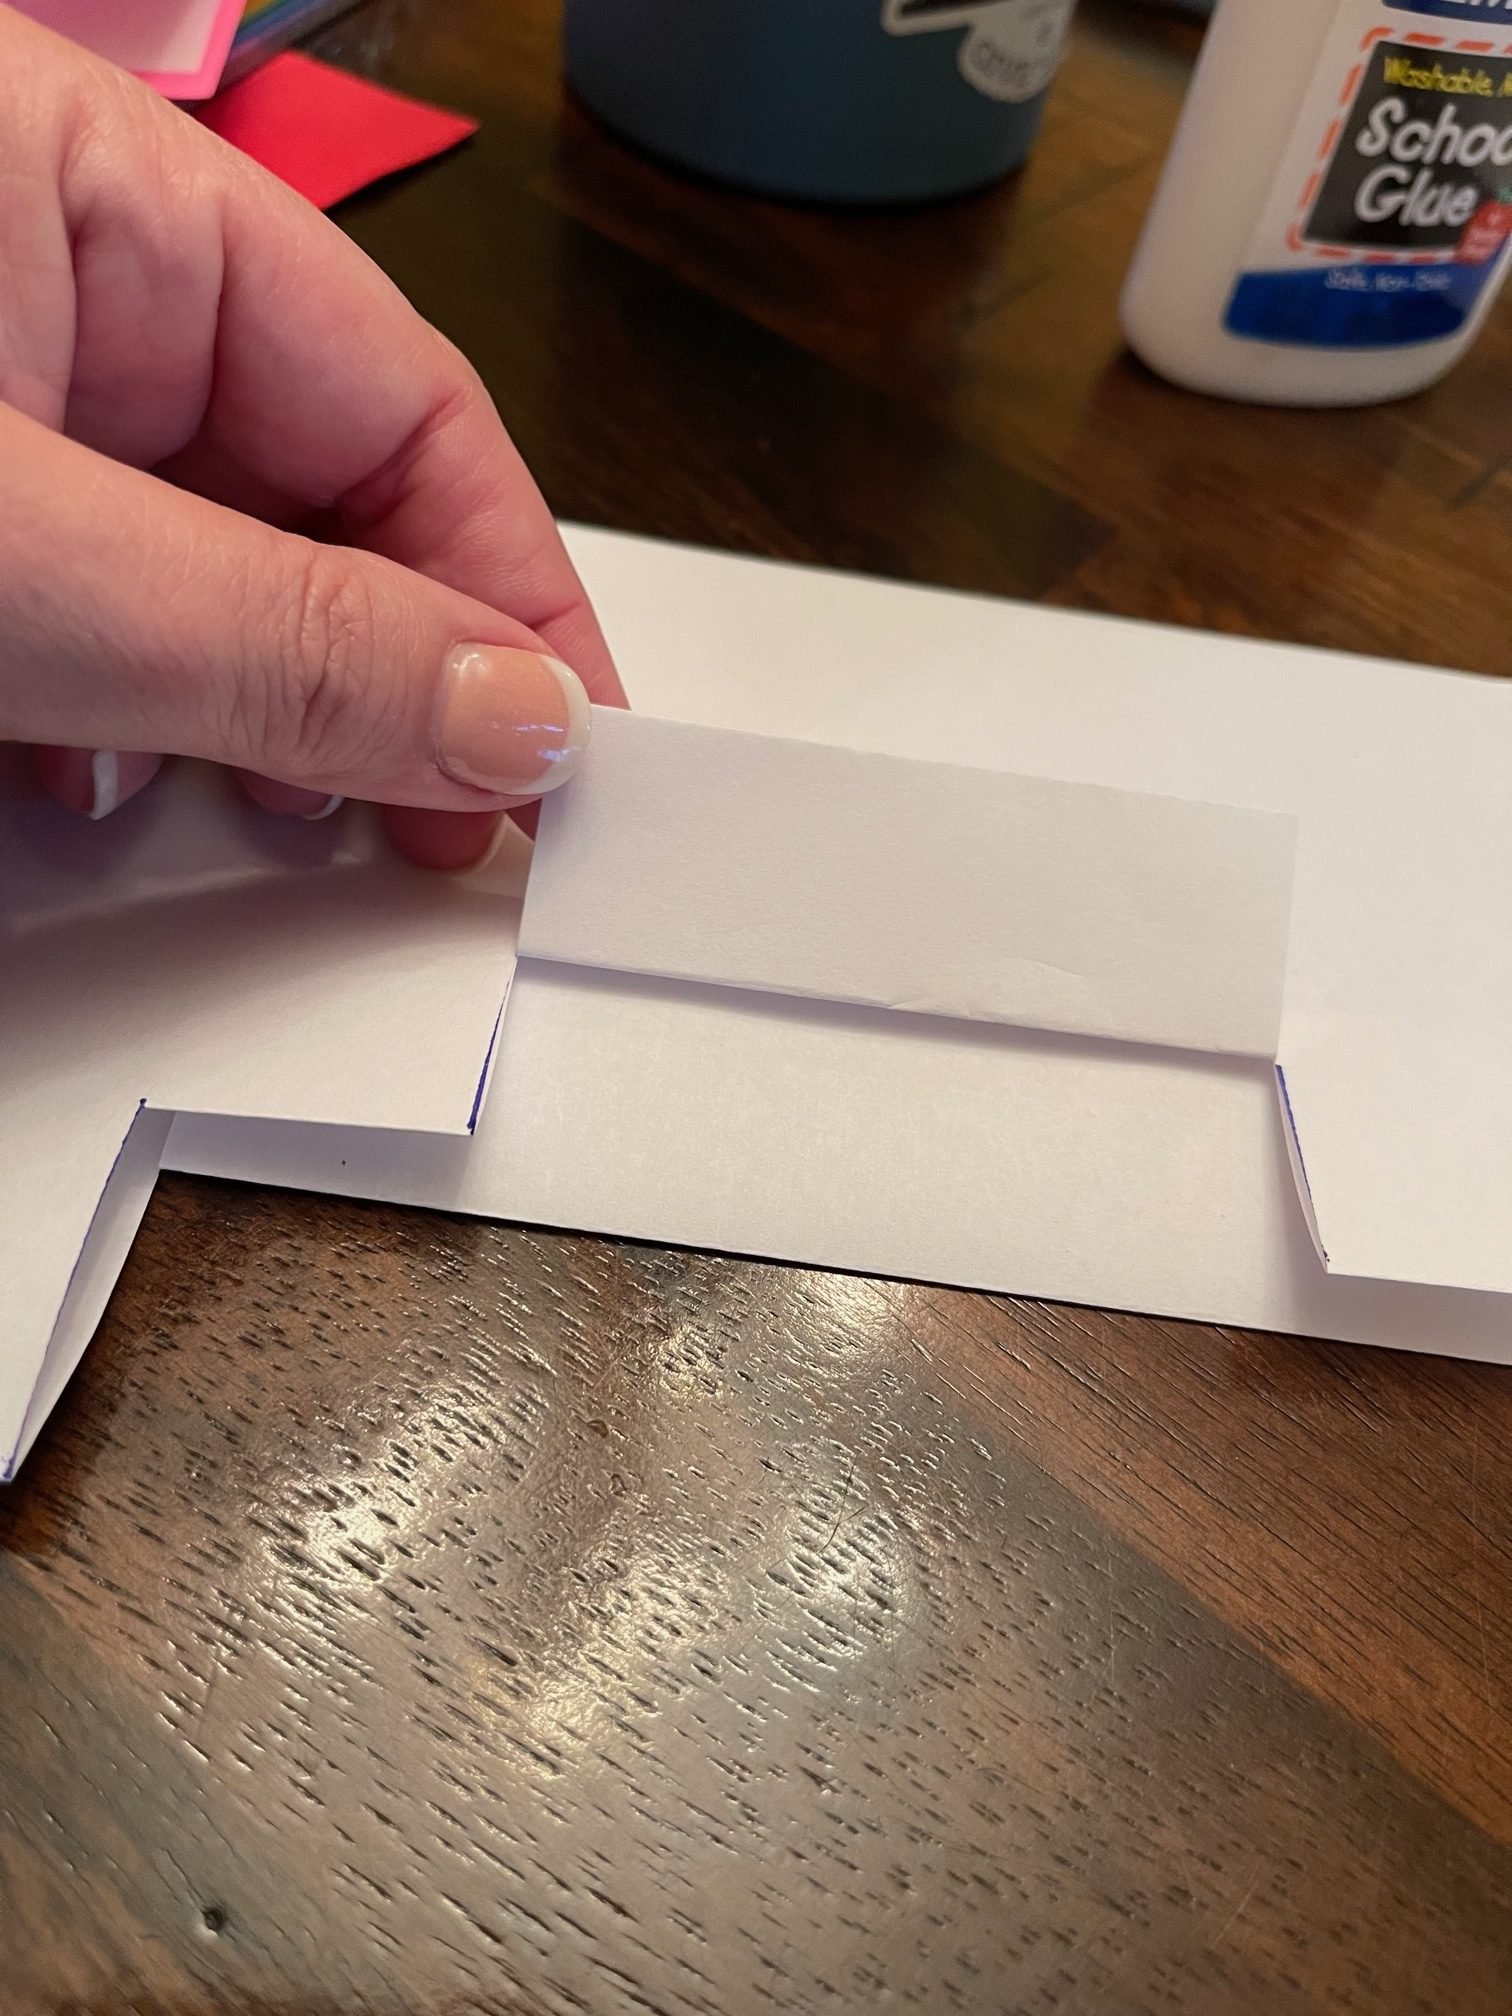
Your first cuts will be on the lines you drew. Then you will fold the inside up and make a good crease. This is the tricky part. You will open the folded paper and carefully push the cut area through to the other side of the crease. This is the bottom part of your pop-up.
Now you are going to get ready for the second cut. Put a dot at 3 cm in from the last cut – do this for each side. Draw a line up 2.5 cm. Another tricky part – you ONLY cut one layer of paper (see picture), the top part. Fold the newly cut part and make a crease. Open up the paper and carefully push the new cut/folded area through. This will be the middle part of your pop-up.
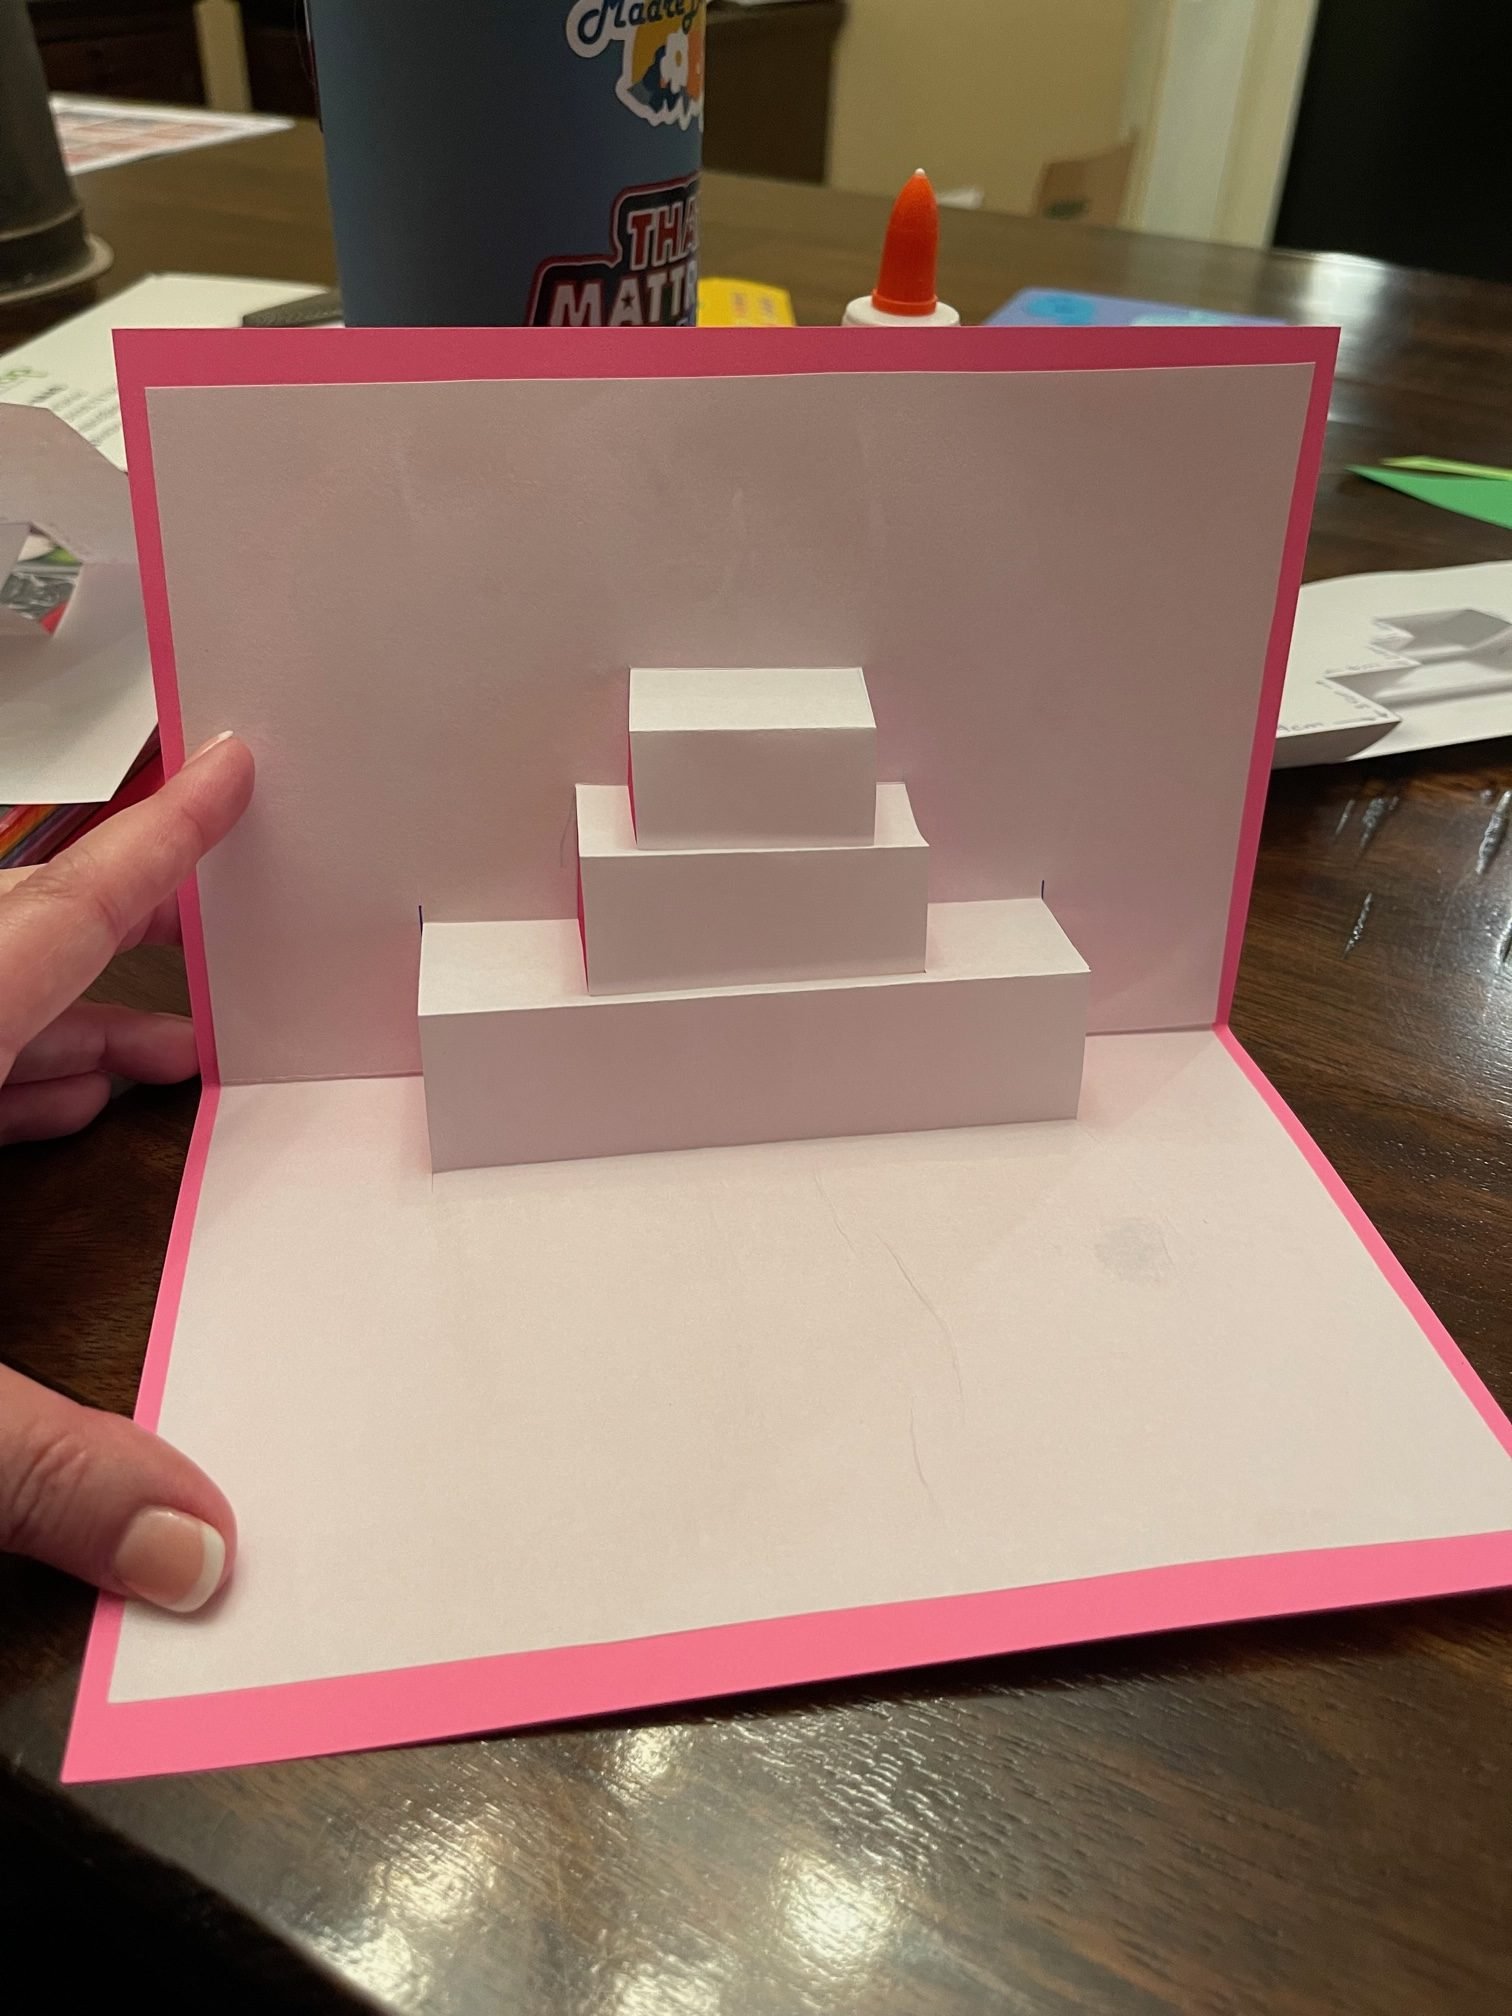
Last and final cut. Mark a dot a 1 cm in from the last cut (each side). Draw a line up 1.5 cm. Just like on the middle area –you will ONLY cut one piece of paper. Fold the newly cut part and make a crease. Just like before – carefully open the paper and push the new section through.
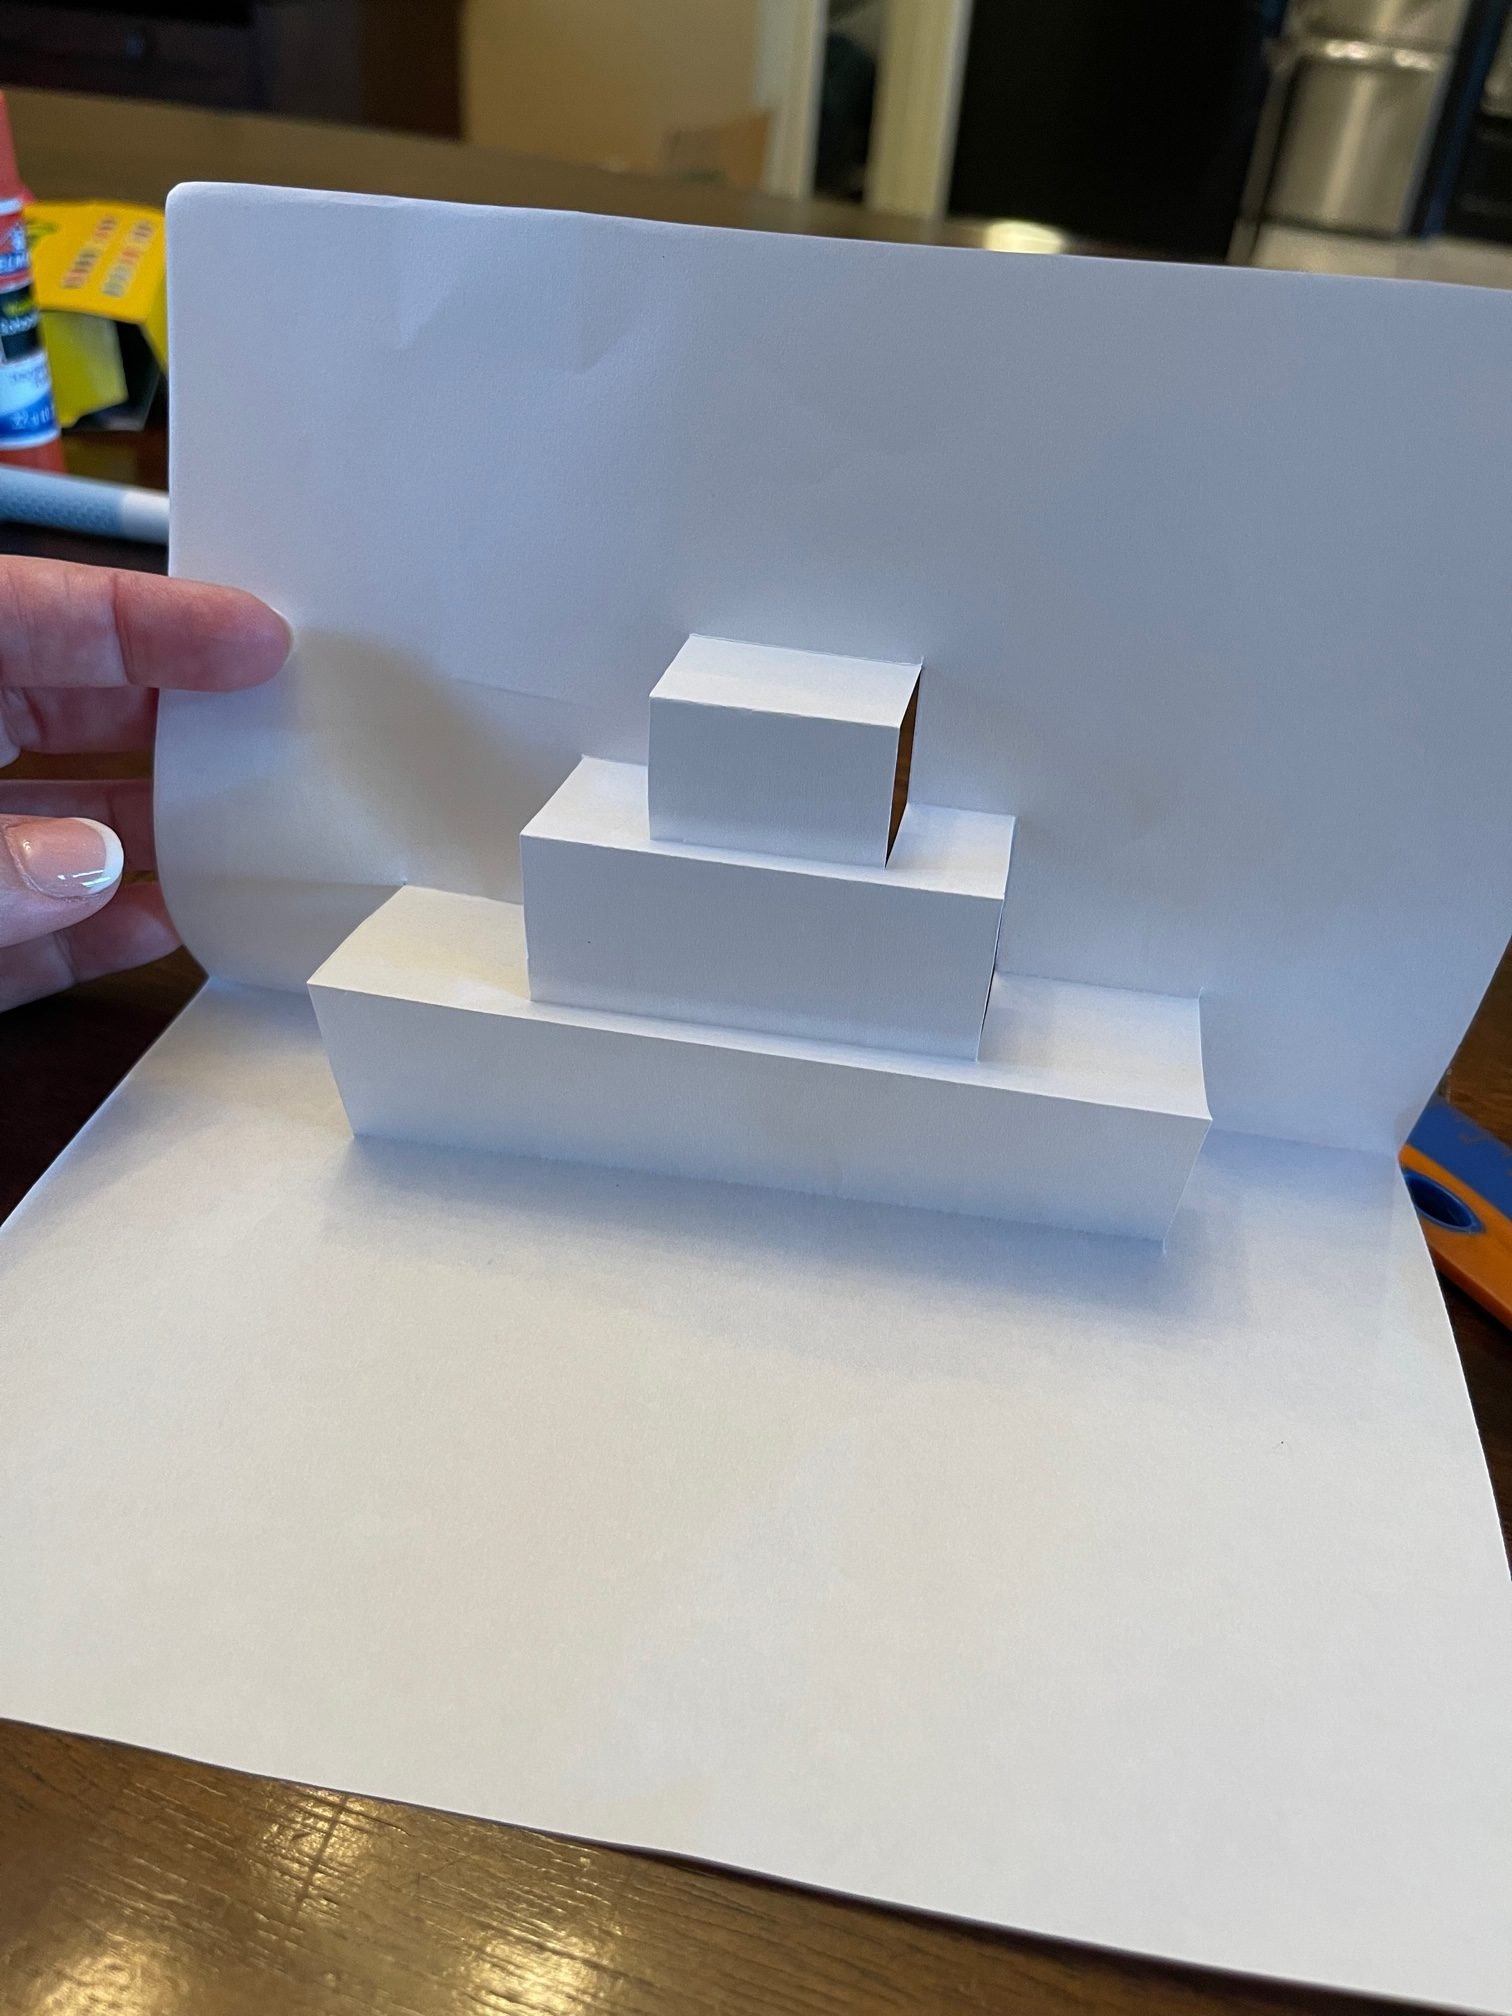
This is your final pop-up and it should look like a three tiered cake.
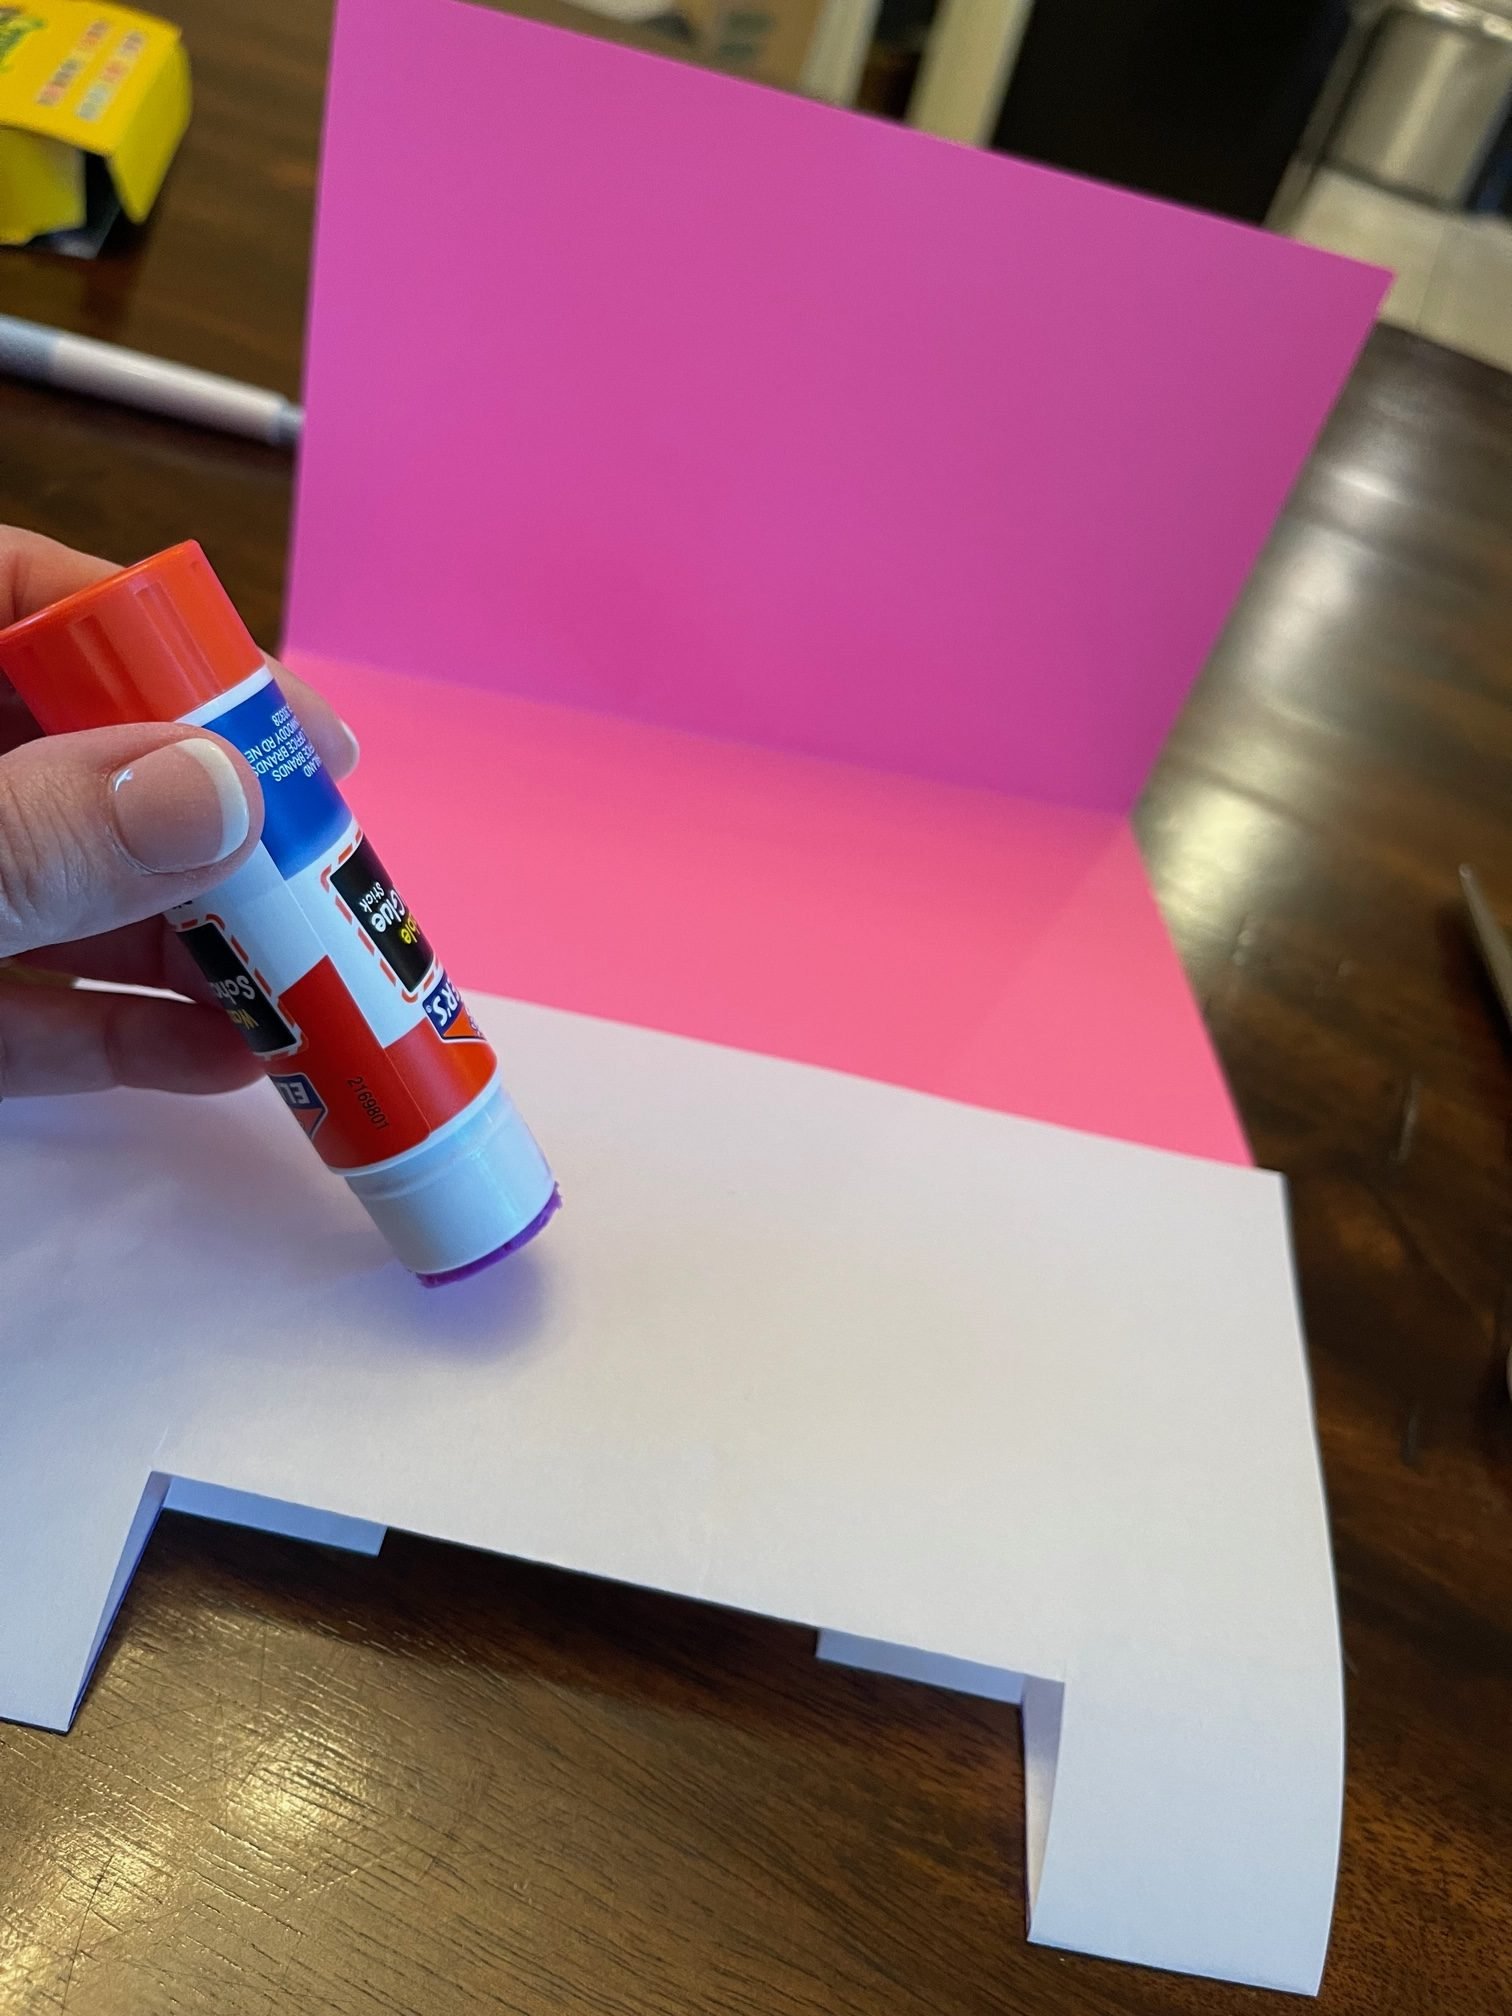
With the color of your actual card – fold the cardstock or construction paper making a nice crease.
Depending on the type of glue you prefer – glue the pop up paper inside the actual card. This is where the parent may want to assist – too much glue will make the papers wet and will take a while to dry before assembling. (advice: glue down the bottom part of the card first – make any adjustments needed before gluing the top part).
Once the glue is dry – you and your littles can create to your heart’s content. You can make this as easy or as hard as you have the patience for. Suggestion – stage all of the items onto card BEFORE you glue. That way you know where/how to place items ahead of time and you can see if they are at the right height for the pop up.
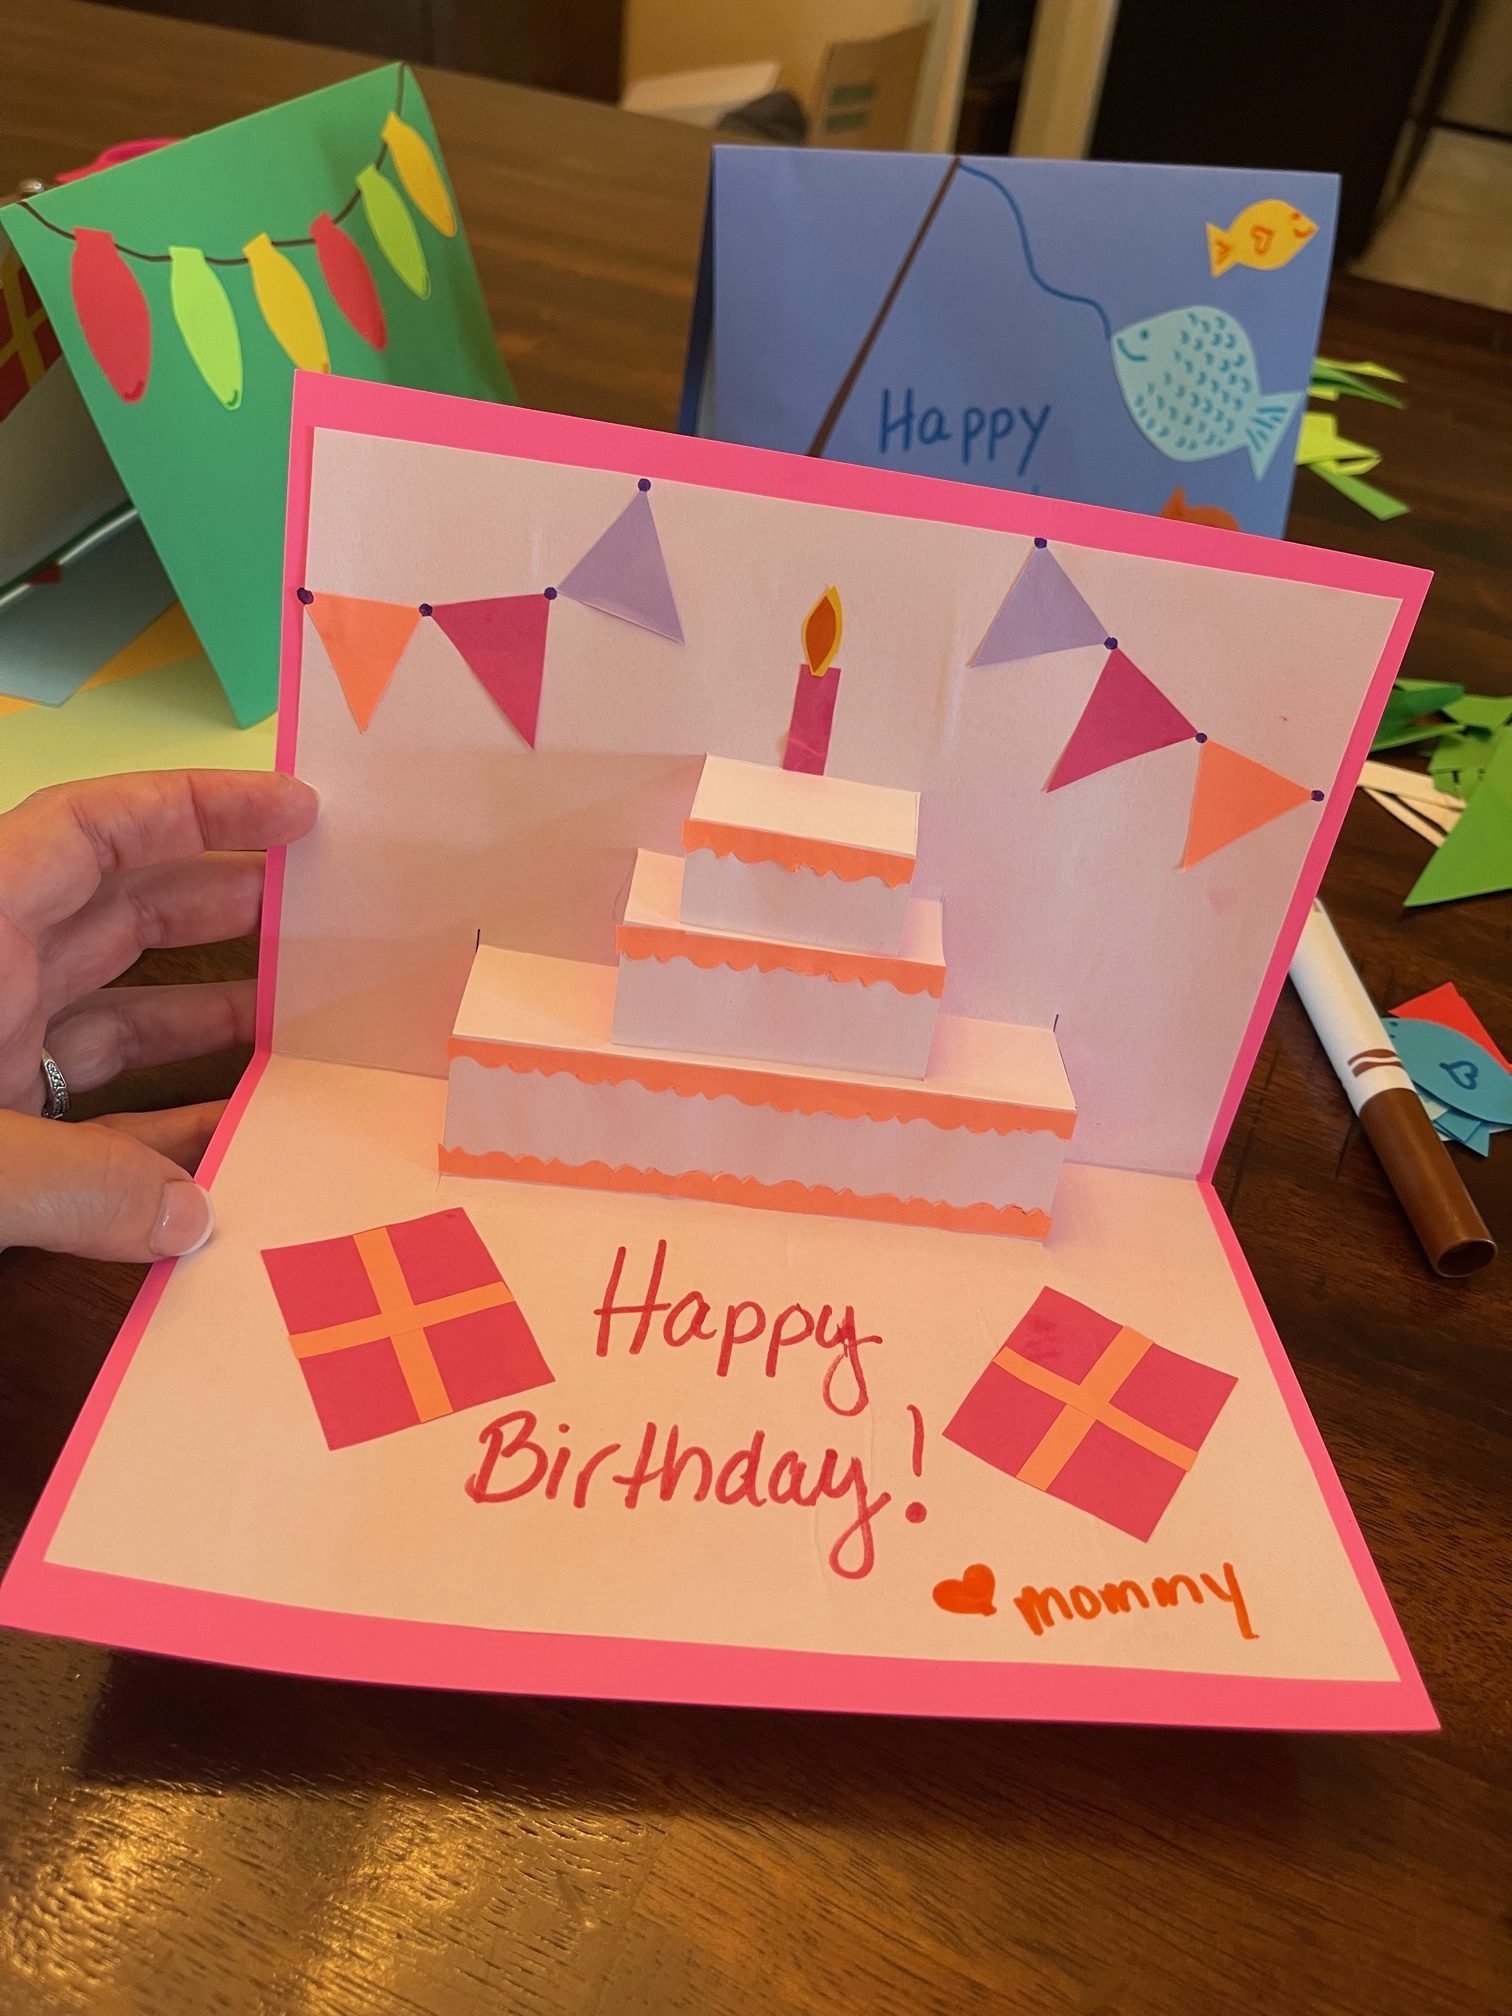
For a birthday card – using the pop-up part is easy to decorate as a cake.
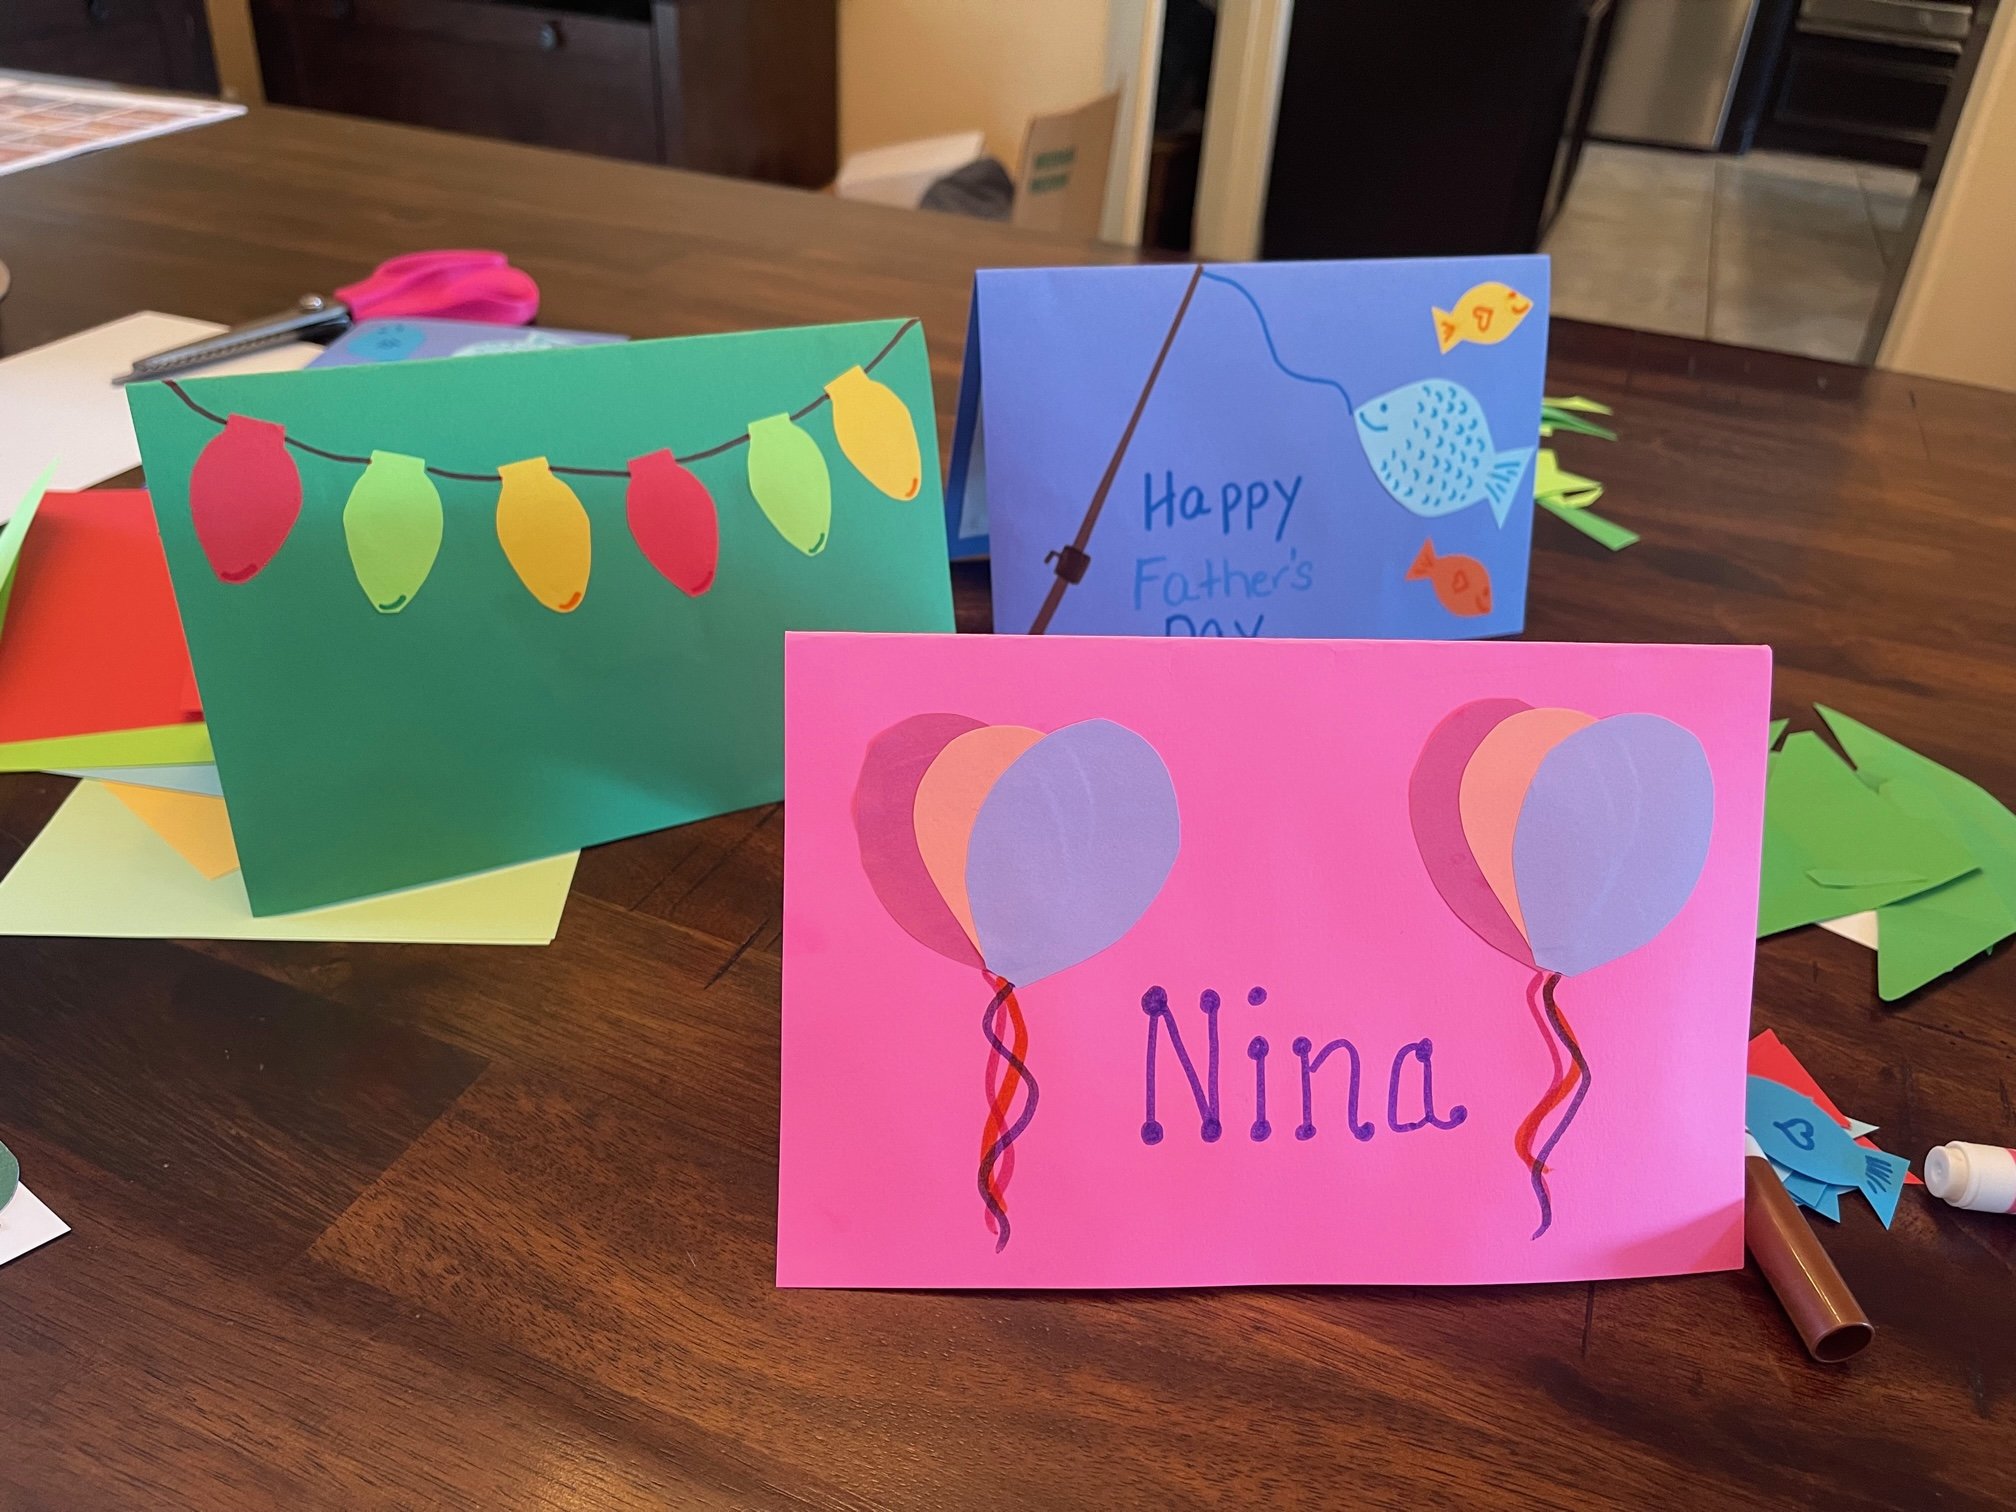
For a Mother’s/Father’s day card –you can spell out I ♥️ MOM or I ♥️ DAD – then decorate with items personal to them. I made one with a fishing pole and fish for my Dad.

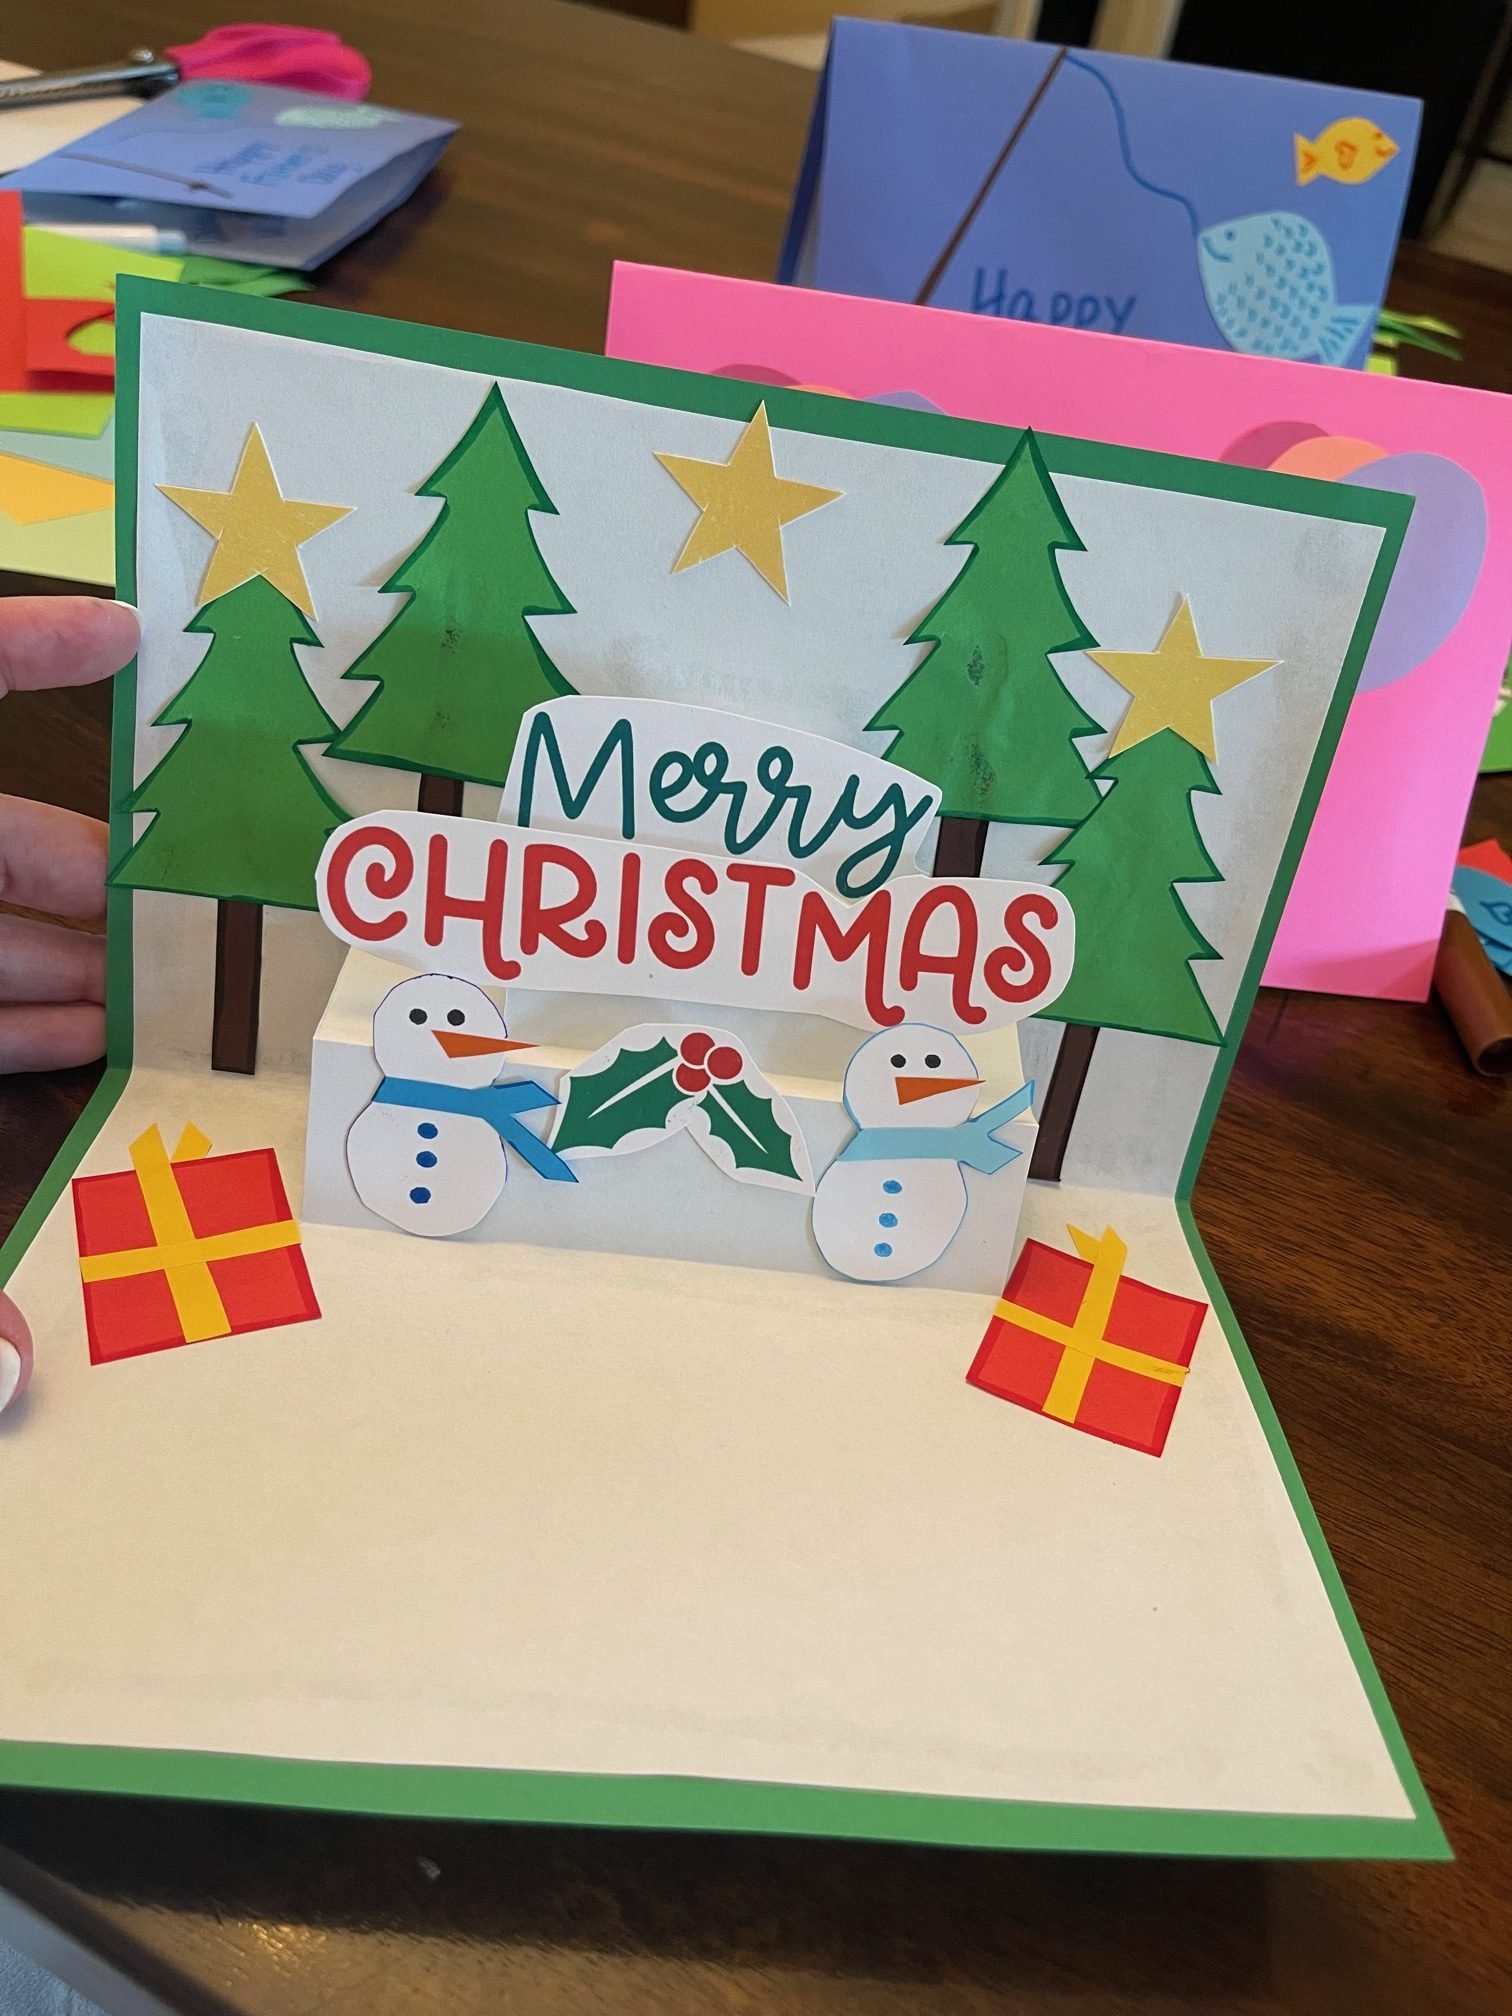
For Christmas – oh so much fun. I made one with lots of trees, snowmen, presents and holiday light bulbs.
MATH LESSON
I promised to help you turn this into a learning lesson.
For elementary ages – it’s important to explain the proper use of a ruler. How to properly measure from line to line. The differences between inches and centimeters.
Use prompts and talking points like:
Can you tell me which side has centimeters?
What are the differences between inches and centimeters?
Measure your hand in both inches and centimeters.
Upper elementary and middle school ages – focus on topics like:
Explain/Show me how you measure 2.5 inches compared to 2.5 centimeters.
What system of measurement does the centimeter follow?
How many centimeters will fit into 10 inches?
Measure your cell phone in both inches and centimeters.
When you make your pop-up card – send up a picture. I can’t wait to see what y’all create.


