


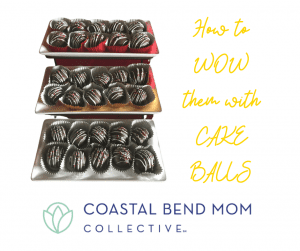
CAKE BALLS!!!
These are the single most requested desserts I am asked to make by all my friends.
When I was a teacher — this was my go to dessert for all the pot lucks.
You can decorate these to make a super fancy looking tasty treat and it’s sure to be a hit.
These are not to be confused with cake pops. I do not put them on a stick — too messy.
If you are ready to WOW your friends and family – here you go!
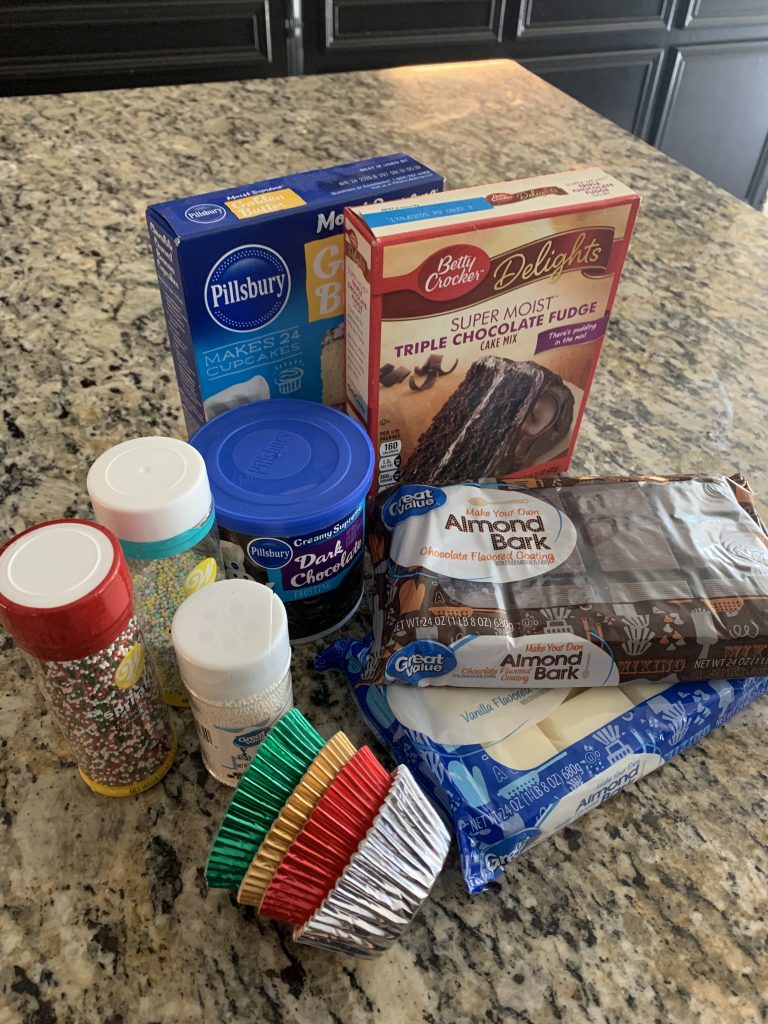
Ingredients:
Box Cake mix (and ingredients listed on the box)
Jar of chocolate frosting
Chocolate candy coating
White chocolate candy coating
Non-pareil sprinkles (optional)
I like to make mine with a devil’s food cake mix or a dark/triple chocolate cake mix. I have used red velvet before — but it doesn’t make a great consistency when making the balls.
Here are the easy steps to make the magic happen.
- Make the cake according to the box directions
- When you take the cake out of the over “FORK” the cake and rip it to shreds. {YES, you heard that right. Rip it up and turn it into a demolished cake.}
- While hot – stir in an entire jar of chocolate frosting make a very messy chocolate gooey cake mixture.
- Cool down in the refrigerator
- Roll out the mix into meatball size balls. Lay the balls out on parchment paper
- Melt the chocolate candy coating in a large Pyrex type glass bowl. It is very easy to burn chocolate – so take your time. I use a microwave on a very low setting, checking every 30 seconds. ( I prefer the Walmart brand “Great Value” it coats thin and isn’t too thick)
- Using two large spoons – I drop a ball into the bowl of melted chocolate coating all sides.
- Gently place the coated ball onto the parchment paper to dry. Repeat until all of the balls are coated.
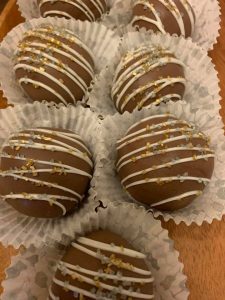
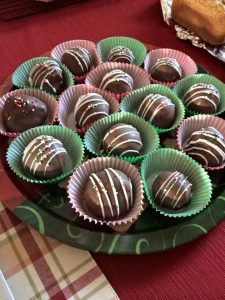
- Melt a small amount of white chocolate, put it into either a pastry bag or a Ziploc bag – and decorate with a design of your choice. I prefer a simple zig zag drizzle. (this is a trick that helps to hide any imperfections of the milk chocolate coating).
- While the white chocolate is still wet — you can add additional decorations with sprinkles. You can use plain white for everyday — or you can get creative depending on the occasion. I love the red and green for Christmas.
- Break off excess dried chocolate to make the all look as round as possible,
- Last and final step– to really make a great presentation, place each dry ball into a pretty cupcake liner. I prefer the foil ones for a nicer presentation.

I am not sure where this recipe originated – but it was given to me in my teaching days at Vernon Middle school 2008-2012.
I actually made a youtube video tutorial – if you want to check it out here. ENJOY!


